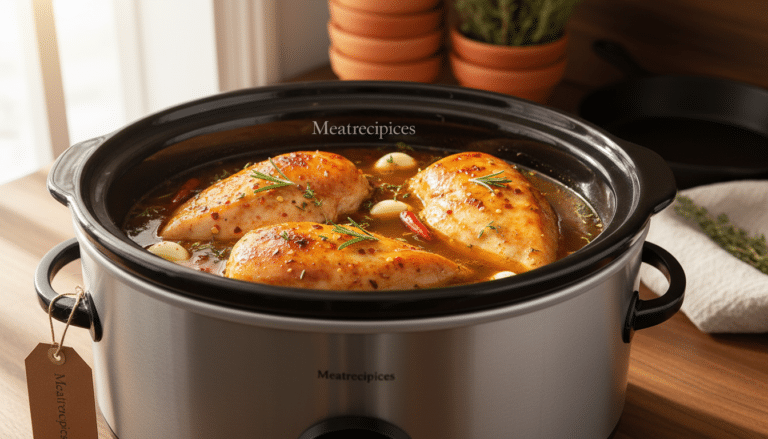
Guide to Cooking Oven Chicken Wings
Welcome to your guide on cooking oven chicken wings. Here, you’ll learn how to make crispy, tasty wings at home. We’ll cover everything from ingredients to serving and storage, so you always get great results.
Discover an easy recipe for oven-baked wings that’s less messy than deep frying. These methods are perfect for any occasion, whether it’s a weeknight dinner or a game-day party.
This article is for home cooks in the United States. It’s written in a friendly, straightforward way. Follow our steps to make delicious, crispy wings every time.
Table of Contents
Key Takeaways
- You will learn clear, repeatable steps for oven chicken wings.
- The guide to cooking oven chicken wings emphasizes easy prep and less mess.
- Techniques here help you achieve the perfect chicken wings recipe every time.
- Methods scale from single servings to party platters for the best oven chicken wings.
- Focus areas include ingredients, prep, cooking, flavoring, serving, and storage.
What Are Oven Chicken Wings?
Knowing the basics is key to better cooking. Chicken wings have three parts: the drumette, the flat (or wingette), and the tip. You can find whole wings or pieces at stores like Walmart and Kroger. Butchers and specialty shops sell pre-separated parts for easier prep.
The drumette has more meat and cooks slower than the flat. The flat has a higher bone-to-meat ratio and crisps differently.
When shopping, you’ll find various types of chicken wings. You can buy whole wings, separated parts, or party wings for smaller portions. Fresh and frozen wings each have their own benefits. Brands like Perdue and Tyson offer organic or free-range options that can subtly change texture and flavor.
Oven cooking has clear advantages over deep frying or air frying. It offers even heat, easy cleanup, and a safer process for home cooks. With the right techniques, you can achieve crispy skin and juicy meat without excess oil. Oven-roasted chicken wings are perfect for parties or weeknight meals, as they keep their crunchiness even after adding sauces.
| Choice | What to Expect | Best Use |
|---|---|---|
| Whole Wings | Three-part piece you can cut yourself; balanced meat and bone | Versatile prep; good for roasting or separating at home |
| Drumettes | Meatier, single bone; similar to a small drumstick | Great for hearty bites and even browning in the oven |
| Flats (Wingettes) | Two thin bones, more skin surface for crisping | Ideal for achieving crunchy texture with oven techniques |
| Party Wings | Trimmed and sized for appetizers; often fewer bones | Best for gatherings and even cooking on sheet pans |
| Fresh vs Frozen | Fresh offers mild texture advantage; frozen adds convenience | Choose frozen for storage; fresh for immediate roasting |
| Organic/Free-Range (Perdue, Tyson) | Higher cost; subtle flavor and ethical sourcing differences | Good for shoppers focused on quality and provenance |
Essential Ingredients for Oven Chicken Wings
Great oven-baked wings start with the right ingredients. Here’s how to choose the best poultry, seasonings, and sauces for flavorful wings every time.
Fresh vs. Frozen Wings
Fresh wings have better texture and are ready to use right away. You’ll get crisper skin.
Want a classic crispy version? Learn how to make fried chicken wings at home with a simple step-by-step method.
Frozen wings are convenient and safe. They’re often frozen soon after packing, keeping quality high. Thaw frozen wings in the fridge for 24 hours. For quicker thawing, use cold water, changing it every 30 minutes until thawed. Always follow USDA guidelines for safe thawing to avoid uneven cooking and food safety risks.
Spices and Seasonings
Simple pantry items make great dry rubs. Start with kosher salt and black pepper. Add garlic powder, onion powder, smoked paprika, and a bit of cayenne for heat.
Chili powder and brown sugar balance the heat with sweetness. Fresh or dried thyme or rosemary add herb flavors. You can mix your own rub or use pre-made ones from McCormick or Badia for ease.
Sauces to Enhance Flavor
Sauces make baked wings a hit. For Buffalo style, toss wings in Frank’s RedHot mixed with melted butter. Sweet Baby Ray’s is a favorite for barbecue, or try homemade BBQ sauce.
Asian glazes use soy sauce, hoisin, honey, and sriracha for a glossy look. Honey-garlic and sweet-and-spicy sauces work well with baked texture.
To keep skin crisp, toss wings in sauces after cooking. For a glazed finish, brush sauce on and bake for a few minutes. This method keeps the wings crispy while adding flavor.
| Ingredient Category | Common Options | Why It Matters |
|---|---|---|
| Poultry | Fresh wings, Frozen wings | Fresh gives optimal texture; frozen offers convenience and safety when thawed properly |
| Basic Seasonings | Kosher salt, black pepper, garlic powder, onion powder | Creates a balanced savory base for any flavor profile |
| Spice Additions | Smoked paprika, cayenne, chili powder, brown sugar | Adds color, heat, and sweet balance for depth |
| Herbs & Blends | Thyme, rosemary, McCormick blends, Badia blends | Introduces aromatic notes; blends save time and ensure consistency |
| Sauces | Frank’s RedHot + butter, Sweet Baby Ray’s, soy/hoisin/honey/sriracha mixes, honey-garlic | Defines final flavor; toss after cooking for crispness or brush and bake briefly for a glaze |
Preparation Steps for Chicken Wings
Plan ahead for delicious oven-baked chicken wings. Good prep saves time and keeps flavors strong. Here are steps for cleaning, drying, marinating, and applying a dry rub.

Cleaning and Drying Wings
Rinse wings under cold water and dry them with paper towels. This removes moisture for crispy skin. Trim fat and cut off tips if not needed.
Sanitize your cutting board and hands after handling raw poultry. Follow USDA food-safety guidance: wash surfaces with hot soapy water and use a separate board for produce to avoid cross-contamination.
Marinating Techniques
Use wet marinades like buttermilk, plain yogurt, or citrus blends to tenderize and add depth. A buttermilk soak softens proteins and helps spices stick. Marinating chicken wings for 30 minutes up to overnight works well; shorter times add surface flavor, longer times deepen it.
Be cautious with highly acidic mixes, such as straight lemon or vinegar, because long contact can alter texture. Refrigerate wings while marinating and discard used marinade unless you boil it first for sauce use.
Dry Rub Application
For crisp, flavored skin, toss wings with a tablespoon of oil per pound to help the seasoning cling. Mix a rub using roughly 1 tbsp kosher salt, 1 tsp black pepper, 1 tsp garlic powder, 1 tsp smoked paprika, and 1 tsp brown sugar per pound of wings. Adjust the heat with cayenne or chili flakes to taste.
Coat each wing evenly by shaking in a bowl or massaging the rub with your hands. Let the seasoned pieces rest on a tray for 15–30 minutes so the flavors set, which helps when aiming for tasty baked chicken wings.
Cooking Methods for Oven Chicken Wings
Choosing the right method can make simple wings stand out. This section covers common methods, how temperature affects texture, and the importance of a rack. Read each point to find the best technique for your taste.
Baking vs. Roasting
Knowing the difference between baking and roasting is key. Baking keeps meat tender with moderate heat. Roasting uses high heat for a crispy, brown skin.
For juicy meat and a soft crust, baking is best. For crispy skin and deep color, roast at higher temperatures. Adjust cooking time and seasoning for the perfect texture.
If you prefer deep frying instead of baking, check our guide on how long to fry wings for perfectly crispy results.
Cooking Time and Temperature
Stick to specific temperature ranges to avoid mistakes. Set your oven between 400°F and 425°F. Cook for 35–50 minutes, flipping once halfway.
For tender meat that crisps, try the slow-then-hot method. Start at 300°F for 20–25 minutes, then raise to 425°F for another 20–25 minutes. Use an instant-read thermometer to check for 165°F minimum or 175–180°F for easier meat pulling.
Using a Rack for Crispy Skin
A wire rack over a baking sheet improves air circulation and fat drainage. This is crucial for crispy, evenly browned skin.
Line the pan with foil for easy cleanup. If you don’t have a rack, bake on parchment and flip often to prevent sticking. A rack can make a big difference in achieving crispiness.
- Tip: Pat wings dry before cooking to remove surface moisture that prevents crisping.
- Tip: Space wings so hot air reaches every piece; avoid overcrowding the pan.
How to Achieve Crispy Oven Chicken Wings
To get crispy skin, mix science with technique. Follow these tips for golden, crackly, and tasty oven chicken wings.
The Role of Baking Powder
Baking powder, without aluminum, changes the skin’s pH. This helps break down proteins and moves moisture to the surface. It then evaporates during cooking.
For crispy wings, use about one teaspoon of baking powder per pound of chicken. Make sure it’s aluminum-free to avoid a metallic taste. This keeps your wings tasting great.
Airflow and Wing Placement
Airflow is key, not just high heat. Place wings on a wire rack over a sheet pan for air to flow. This prevents steam from making the wings soft.
Don’t overcrowd the pan. If your oven has hot spots, rotate the pan halfway through. This ensures even cooking.
Broiling for Extra Crunch
Broiling adds a final crisp. Place the rack six to eight inches from the broiler. Broil for one to three minutes per side to crisp the skin.
Remember, a light dusting of baking powder, smart wing placement, and broiling will give you crispy chicken wings every time.
Flavor Variations for Oven Chicken Wings
You can make many meals from one batch of wings with creative sauces and techniques. Here are three popular ways to keep your wings tasting like they’re from a restaurant. Each method ensures your oven-baked wings are delicious.
Classic Buffalo
Mix melted butter with Frank’s RedHot or a similar cayenne-based sauce in a 1:2 ratio. Toss your baked wings in the sauce until they’re evenly coated. Serve with blue cheese dressing and celery sticks for the authentic American pairing.
Asian-Inspired Glazes
Combine soy sauce, honey, rice vinegar, sesame oil, garlic, and fresh ginger. Add gochujang or Sriracha for heat. Simmer the glaze until it thickens, then toss the wings. Return them to the oven for 3–5 minutes to set the glaze.
Sweet and Spicy Combinations
Apply a dry rub before baking, then brush with a glaze of honey or brown sugar mixed with chili flakes. Bake, glaze, and broil briefly to caramelize the sugars. This method creates complex, sweet and spicy chicken wings.
- Try swapping butter for ghee in the Buffalo mix for a nuttier note.
- Use low-sodium soy and extra honey if you prefer milder Asian-inspired wings.
- Apply dry rubs with smoked paprika or cumin to deepen sweet and spicy chicken wings flavors.
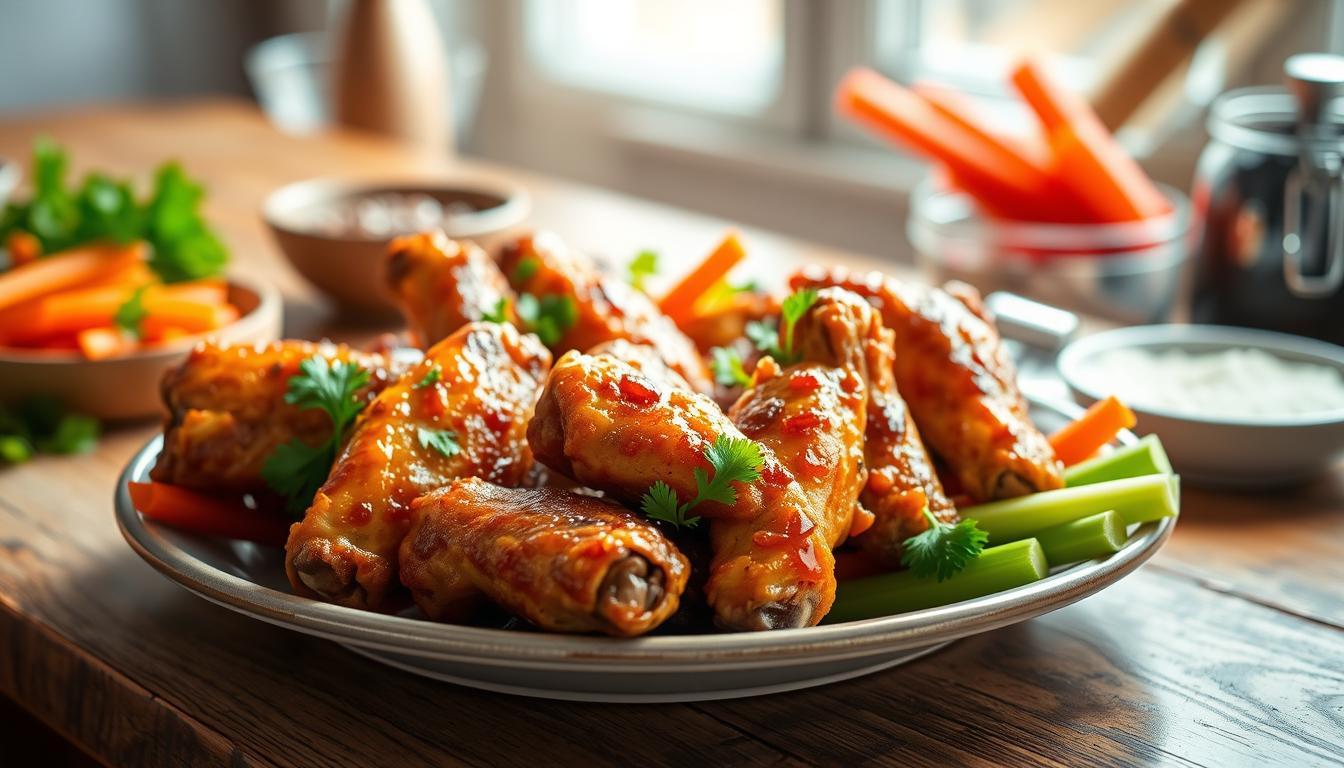
Serving Suggestions for Chicken Wings
When your tasty baked chicken wings come out of the oven, set up a simple spread. This keeps flavors bright and textures crisp. Place the warm platter in the center and arrange sauces and sides so everything stays within reach.
Ideal Side Dishes
Choose side dishes for wings that contrast the richness of the meat. Celery and carrot sticks add crunch and a cool finish. Potato wedges or French fries bring comfort and a salty counterpoint. For richer sauces, serve mac and cheese or cornbread to balance heat.
Match sides to the wing flavor. Sesame noodle salad pairs well with Asian glazes. Blue-cheese slaw works best with Buffalo-style wings. A simple green salad helps lighten a heavy spread.
Dipping Sauces You Can’t Miss
Offer a mix of creamy and tangy options among the best dipping sauces wings need. Classic choices include blue cheese dressing and ranch dressing. Use brands like Kraft Blue Cheese or Hidden Valley Ranch for reliable convenience.
These oven chicken wings pair perfectly with this homemade Chick Fil A sauce recipe.
Include honey mustard and garlic aioli for milder, savory notes. Sweet chili sauce and a homemade barbecue sauce give sweet-spicy contrast. For a quick barbecue, simmer ketchup, apple cider vinegar, brown sugar, and a splash of Worcestershire for a balanced homemade dip.
Plating Tips for Presentation
Plating chicken wings with simple garnishes lifts the whole table. Use a warmed platter to keep wings hot. Scatter chopped parsley or sliced scallions for color. Toasted sesame seeds suit Asian-style glazes. Lemon wedges brighten heavier sauces.
Place each dipping sauce in a small bowl to keep wings crisp. Serve family-style on a large board for casual gatherings. For more formal dining, portion wings on individual plates with a side salad and a sauce ramekin.
Common Mistakes to Avoid
Wanting crisp, flavorful oven wings can be tricky. A few small mistakes can mess up your dish. Here are tips to avoid common errors and keep your recipe perfect.
Overcrowding the Pan
Don’t stack wings on top of each other. This traps steam and keeps the skin soft. Make sure to leave at least 1/2 inch of space between each wing. Or, use two baking sheets for better airflow.
For large batches, cook in shifts. This ensures even cooking and browning on every wing.
Skipping Preheat
Always preheat your oven to the right temperature before adding wings. Skipping this step can lead to slow cooking and uneven color. If your oven takes a while to heat up, use an oven thermometer to check.
Not Drying the Skin
Wet wings steam while baking, which makes them less crispy. Dry the wings with paper towels before seasoning. If you have time, refrigerate them uncovered for 30–60 minutes to dry the skin better.
- Quick fix: For a quick crisp, toss wings with a light dusting of baking powder before baking.
- Timing tip: Cook in batches to keep your recipe consistent.
- Tool tip: Use a wire rack over a baking sheet to lift wings away from juices.
Storage and Reheating Tips
Keeping your wings tasty after the first meal takes a little care. Follow simple steps to preserve flavor and texture for delicious oven-baked wings leftovers that taste fresh the next day.

How to Store Leftover Wings
Cool wings to room temperature, no more than two hours after cooking. Place them in airtight containers and refrigerate for up to 3–4 days. For longer storage, freeze wings in a single layer on a sheet tray, then move them into freezer bags. Label each bag with the date and sauce type to make retrieval easy.
Best Practices for Reheating
Reheat in the oven at 350°F for 10–15 minutes or at 400°F for 8–12 minutes. Place wings on a rack for even heating and crisp skin. Use a thermometer to confirm an internal temperature of 165°F. Avoid relying on the microwave alone because it softens the skin. If you must microwave, finish under the broiler or in the oven to restore crunch.
Using Air Fryers for Recrisping
Air fryers are excellent for quickly recrisping wings. Preheat the unit to 375°F and re-crisp refrigerated wings for 4–6 minutes, shaking the basket halfway through. For frozen wings, cook 12–18 minutes depending on size and your model. Adjust times and check internal temperature to ensure safety and quality.
| Storage Method | Temperature | Duration | Notes |
|---|---|---|---|
| Refrigerator, airtight container | 40°F or below | 3–4 days | Label with date and sauce; cool within 2 hours |
| Freezer, single layer then bag | 0°F or below | 2–4 months | Flash-freeze on a tray first to prevent sticking |
| Oven reheating | 350–400°F | 8–15 minutes | Use a rack; confirm internal temp 165°F |
| Air fryer recrisp wings | 375°F | 4–6 min (refrigerated), 12–18 min (frozen) | Shake basket halfway; adjust for model variations |
| Microwave then oven/broiler | Medium microwave, then broil/400°F | Short microwave burst, 2–5 min finish | Microwave softens skin; finish under high heat to crisp |
Final Thoughts on Making Oven Chicken Wings
You’ve learned the basics and how to make perfect chicken wings. Oven cooking lets you control texture and flavor. Keep track of what works and what doesn’t to make better wings next time.
Experimenting with Your Own Recipes
Try new flavors like citrus, smoky paprika, or Asian glazes. Change one thing at a time to see what makes a difference. Small notes on proportions and oven settings will help you perfect your recipe.
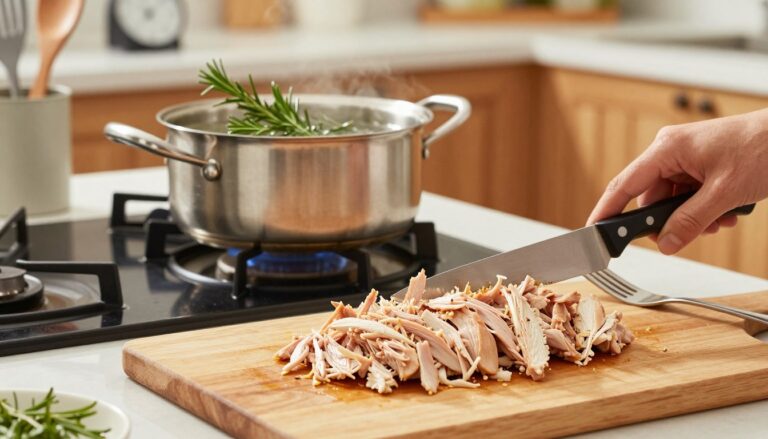
You can also use leftover chicken from this guide on how to cook chicken to shred perfectly for wraps, bowls, and sandwiches.
Sharing with Friends and Family
Wings are great for game days, potlucks, or casual dinners. Plan ahead by doubling trays and setting up a sauce station. Use quality pans and an instant-read thermometer to keep food hot and consistent.
Where to Find More Cooking Tips and Tricks
For more technique and safety tips, check out USDA resources and sites like Serious Eats and America’s Test Kitchen. Food Network and Bon Appétit have recipe ideas to inspire you. Invest in a wire rack, rimmed sheet pans, and a reliable thermometer to improve your cooking.
FAQ
What makes oven chicken wings different from deep-fried or air-fried wings?
Should I use fresh or frozen wings for the best results?
How do I get really crispy oven-baked wings?
What temperature and cooking time should I use for oven-roasted wings?
Can I apply a wet marinade and still get crispy skin?
What dry rub proportions work well for homemade chicken wings?
When should I add sauce—before or after baking?
Is baking powder safe to use, and why does it help?
How do I prevent overcrowding on the baking sheet?
What are good sauce ideas for flavorful wings?
How should I store and reheat leftover wings?
Can I use parchment or foil instead of a rack for easier cleanup?
What common mistakes should I avoid when making the best oven chicken wings?
Where can I find more tips and recipe inspiration for perfect oven chicken wings?
⭐ Love This Recipe? Tell Us What You Think!
There are no reviews yet. Be the first one to write one.