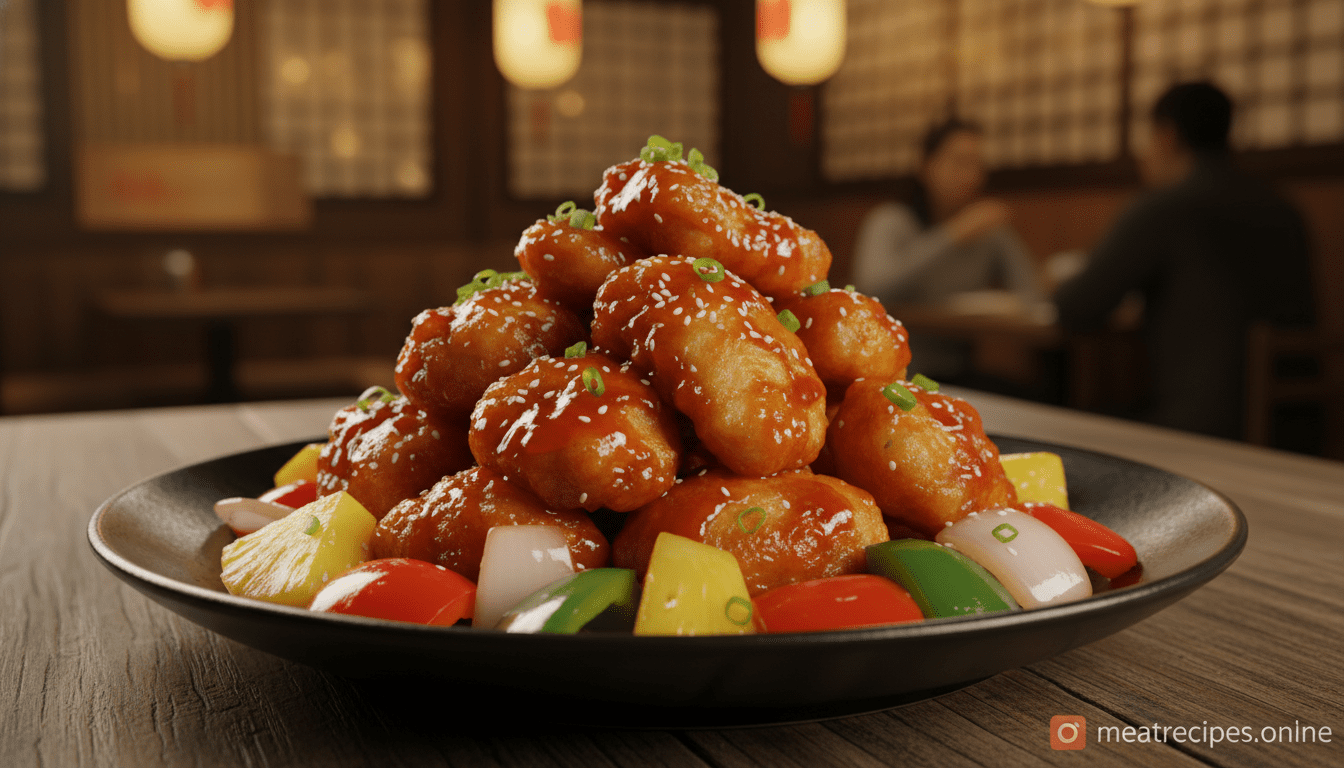
Sweet n Sour Pork: A Flavorful Classic
Have you ever wondered why one bite of this classic can beat takeout every time?
This sweet n sour pork version blends century-old Chinese techniques with kitchen-friendly steps. Nagi from RecipeTin Eats highlights double dredging and double frying to keep the meat juicy and tender.
You will learn how a balanced sauce—the right sugar and vinegar—turns simple ingredients like pineapple and fresh pork into a standout meal.
This guide shows you a practical sour pork recipe that rivals restaurant fare. You’ll also see tips to make sweet sour chicken, serve over rice, and prep ingredients so cooking feels effortless.
Ready to master a reliable pork recipe that becomes a family favorite? Keep reading to uncover techniques, timing, and the small tricks that make every bite sing.
Key Takeaways
- Classic techniques like double frying ensure tender, juicy meat.
- A balanced sauce of sugar and vinegar is the dish’s backbone.
- Fresh pineapple and quality pork elevate homemade recipes.
- This recipe can rival sweet sour chicken found in restaurants.
- Proper prep and simple steps make this version easy to master at home.
Table of Contents
Why Homemade Sweet n Sour Pork Beats Takeout
A simple home recipe gives you better texture, cleaner oil, and a sauce you can actually trust.
Cost and quality tip: making sweet sour pork at home saves money and lets you choose fresh ingredients. Nicole from Simple Home Edit points out that the homemade version is often healthier than delivery options.
When you control the oil for the fry and the ingredients in the sauce, the meal tastes lighter and fresher. You can cut down on sugar and avoid that bright pink takeout sauce.
Time matters. This pork recipe usually takes less time than waiting for a delivery. That makes it perfect for a busy weeknight.
- You customize flavor and pineapple levels.
- The texture stays crisp when served over rice.
- This recipe often pleases kids more than takeout chicken versions.
Selecting the Best Cuts of Pork
Start by picking meat that can handle high heat without drying out. Choose cuts with good marbling so the final dish stays juicy and flavorful.

According to the USDA Food Safety and Inspection Service, cooking pork to 145°F helps ensure it stays both safe and juicy.
Pork Shoulder vs Loin
Pork shoulder (pork scotch) is the top pick. The fat marbling keeps the meat tender even after frying. Cut your shoulder or pork loin into uniform 2 cm pieces so they cook evenly in the pan.
Pork loin and tenderloin are leaner and will dry quickly if overcooked. If you use loin, trim excess gristle and watch cooking time closely.
Avoiding Tough Cuts
Avoid pork belly and bone-in ribs; they don’t suit quick stir fry. Use a large bowl to marinate shoulder with garlic, onion, and a splash of soy. A bit of pineapple in the marinade helps tenderize the meat.
- Add bell pepper and a little onion for crunch.
- Test oil heat in a small pan before adding all pieces.
- Choose the freshest cuts from your butcher for the best result.
The Secret to Velveting Meat
Velveting turns ordinary cuts into silk-soft pieces that stay juicy under high heat.
Velveting is a simple Chinese technique that uses a small amount of baking soda to soften fibers. You coat the meat, rest it briefly, then rinse and pat dry before dredging. That short time in the marinade is the key to achieving a plush texture.
The trick works for more than just pork—Nagi notes the method shines with chicken and beef too. When done correctly, the meat stays moist even after a hot, fast fry. Your sauce will cling better to velveted pieces, giving each bite a cohesive, restaurant-style finish.
- Use a pinch of baking soda and no more than 15–20 minutes for small cubes.
- Add a splash of pineapple juice to the marinade for extra flavor and mild tenderizing action.
- Rinse well after velveting, then follow your double dredge and fry steps for best crispness.
Result: velveted meat that improves your sweet sour dish and helps you recreate the texture of classic sour pork at home.
Mastering the Perfect Sweet n Sour Sauce
A restaurant-style glaze starts with a clear plan: balance acid, sugar, and umami before you heat the pan.
Build your sauce in a bowl before you stir fry. Use ketchup for the red color and cider vinegar to cut sweetness.
Mix: 1 cup water with cornflour to get a glossy, clingy texture. Add brown sugar, a splash of soy sauce, and canned pineapple juice for brightness.
Balancing Tangy and Sweet Flavors
Heat the sauce over medium and stir constantly. A rapid simmer for about 2 minutes will thicken it so it coats the back of a spoon.
“The secret is timing: prepare the sauce, then add it quickly so the fried pieces stay crisp and coated.”
| Ingredient | Purpose | Amount |
|---|---|---|
| Ketchup | Color and body | 2 tbsp |
| Cider vinegar | Tang balance | 2 tbsp |
| Pineapple juice | Natural brightness | 3 tbsp |
| Cornflour + water | Thicken to glaze | 1 cup slurry |
| Soy sauce | Umami depth | 1 tsp |
This sauce works with pork or chicken and tastes great over rice. Adjust vinegar if you want less tang.
Essential Ingredients for Your Stir Fry
Key aromatics: chop garlic, ginger, and onion so they hit the pan quickly. These build the base flavor for the sauce and help the vegetables stay bright.
Vegetables and fruit: use fresh bell pepper and other crisp vegetables. Add a cup of canned pineapple chunks for contrast and natural sweetness in the sweet sour sauce.
- Have all ingredients prepped so you can cook without pausing.
- Use a large pan or wok and a high smoking-point oil to cook over high heat.
- Stir the vegetables for only a few minutes so they stay tender-crisp.
Sauces and seasoning: mix soy sauce with brown sugar and a touch of vinegar to make a glossy sour sauce. Keep a small bowl ready so you can add the glaze in the final minutes.
Serve the finished stir fry over jasmine rice. This quick recipe gets dinner on the table in under thirty minutes and works with pork or chicken for family meals.
Preparing Your Pork for Maximum Crispiness
Crisp texture starts long before the pan heats—your prep decides the final crunch.
The Double Dredge Method
Coat each piece twice with cornflour to build a thick, bubbly shell that seals in juices.
Place pork in a bowl and dust with the first layer. Let it rest for five minutes so the flour becomes tacky.
Managing Moisture
Pat pieces dry before the second dredge. If they are too wet the coating will slide off when you fry.
Use about a cup of cornflour so you can fully cover all pieces without clumping.
Resting the Meat
After the first quick fry, rest the pieces on a rack, not paper towels. A rack prevents sweating and keeps the crust crisp.
Monitor oil temperature during the fry so the coating sets without burning. Finish by tossing in the sour sauce and adding bell pepper for color and crunch.
“The second dredge creates the signature texture—thick, airy, and long-lasting.”
| Step | Key Action | Why it Matters |
|---|---|---|
| First dredge | Coat and wait 5 minutes | Makes the flour sticky for a strong second layer |
| Second dredge | Re-coat before frying | Builds a thick, crunchy shell |
| First fry | Short fry to set crust | Locks juices and creates structure |
| Rest | Place on a rack | Prevents sogginess before final toss |

The Science of Double Frying
Double frying uses two distinct temperature stages to lock in juice and build an extra-crisp crust.
First stage: fry the pork pieces at 180°C (350°F). This cooks the meat through without over-browning the coating.
Second stage: after resting the first batch, heat the oil to about 200°C (390°F) and return the pieces for a short crisping fry of a few minutes. That final blast creates a deep golden shell that holds up when tossed in the sauce.
Frying in batches keeps oil temperature stable. If too many pieces hit the pan at once, oil drops and the coating soaks up fat. Use a large pan and enough oil to cover most of each piece for even color and texture.
“The double-fry technique keeps the crust crisp even after coating, giving you restaurant-quality results at home.”
| Stage | Temperature | Purpose |
|---|---|---|
| Initial fry | 180°C / 350°F | Cook meat through without burning coating |
| Rest | room temp | Let steam escape so crust stays dry |
| Final fry | 200°C / 390°F | Short crisping to form durable crust |
- This method works great with chicken as well as pork.
- You can reuse strained oil later; let it cool and remove bits before storing.
- Add pineapple in the final stir fry to brighten the rich, double-fried pieces.
Alternative Cooking Methods for Busy Nights
A hot oven can mimic some of the crisp you get from deep frying, with far less mess.
Oven baked instructions: Preheat your oven to 220°C / 430°F. Arrange the pieces on a rack set over a baking tray so heat circulates evenly around each piece.

Lightly spray the coating with oil before you slide the tray in. This helps the crust brown and crisp without a full deep fry.
If you have a heavy pan, briefly sear the pieces for 1–2 minutes per side before baking. That extra step seals juices and improves color.
- For quick weeknight cooking, this method saves cleanup and time.
- The oven version gets you about 80–85% of the crisp of a traditional fry, especially once you toss the pieces in a bright sauce.
- Keep an eye on the tray so pieces reach a deep golden brown without burning; timing will vary by oven.
- Serve with pineapple and vegetables for a balanced plate that feels like the original sweet sour recipe.
Pro Tips for Achieving Restaurant Quality
A few pro moves—right heat, quick tosses, and fine grating—will lift your final dish.
Prep flavor fast: use a microplane to grate garlic and ginger so they become juicy and penetrate the meat. Mix your sweet sour sauce in a bowl with brown sugar and soy before you start. That keeps ingredients ready and reduces time at the pan.
Execution tips
Work in batches and keep the oil hot. Place pork into the oil carefully to avoid splashes. Fry until set, rest, then finish for color.
When you toss the pieces in the sauce, do it for only 10 seconds. That short toss gives glossy coverage while keeping the coating crisp for longer. Add bell pepper and onion near the end so they stay tender-crisp.
“High heat and disciplined batches are what make home plates match those from Chinese restaurants.”
- Grate aromatics finely so they blend into the sauce and meat.
- Use a bowl to combine sauce ingredients, including brown sugar and soy.
- If you try sour chicken, follow the same batch and heat rules for best results.
Finish and serve: serve immediately after you add pork to the sauce. That preserves texture and delivers the restaurant-quality bite you want in this recipe.
Serving Suggestions and Pairings
Serving choices make a big difference—pick sides that absorb sauce and add fresh texture.
Choosing the Right Rice
Jasmine rice is the classic match because it soaks up glaze without getting soggy.
A cup of steamed rice per person is a handy rule and keeps portions consistent.
If you want make‑ahead convenience, use fried rice. It reheats cleanly and pairs well with the crispy meat and tangy sour sauce.
Adding Fresh Vegetables
Add bright vegetables to cut the richness. Bell pepper, sliced onion, and garlic tossed briefly in the pan keep color and crunch.
Serve a side of Chinese broccoli or smashed cucumbers dressed with oil and garlic for cooling contrast. Scatter sesame seeds and sliced green onions on top for an authentic finish.
- Plate the stir fry immediately so the coating stays crisp.
- Pair with chicken or other grains like brown rice for variety.
- Garnish with pineapple for a bright pop of flavor.
“A mix of warm rice and fresh vegetables balances rich, fried pieces and makes each bite feel complete.”
Conclusion
Master this recipe and you will have a reliable sour pork recipe that performs like a restaurant plate at home. Focus on velveting and double frying to keep each piece tender, juicy, and crisp.
Make the sweet sour sauce ahead so the final toss takes only a few minutes and preserves texture. Try the oven-baked version if you need a quicker weeknight option that still delivers great results.
These techniques turn a simple version into one of your go-to recipes. Enjoy making this at home, and share the finished dish with family and friends for a satisfying meal in under 30 minutes.
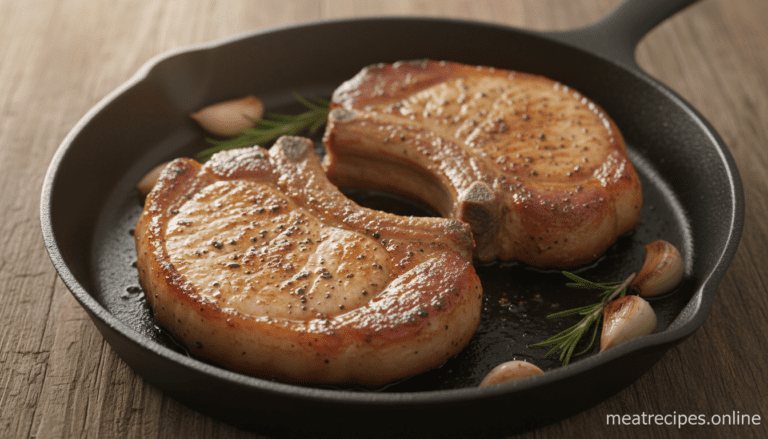
If you’re looking for another quick and juicy dinner idea, you can also try this boneless pork chops recipe for perfectly tender results every time.
FAQ
What cut should you choose for better texture?
How do you achieve a crispy exterior without drying the meat?
Can you velvet the meat and why is it useful?
What’s the simplest way to make the sauce balance tangy and sweet flavors?
How long should you fry each batch to avoid sogginess?
Are there oven baked options for a quicker, cleaner prep?
What vegetables pair best and when should you add them?
How do you prevent the sauce from becoming too thin or too gloopy?
Can you use this recipe with chicken instead of pork?
What rice should you serve with it for the best result?
How can you make the dish ahead for entertaining?
What pantry staples will you need to keep on hand?
⭐ Love This Recipe? Tell Us What You Think!
There are no reviews yet. Be the first one to write one.