Bake the Best Homemade Chicken Pizza at Home
Have you ever wondered why your kitchen creations never quite match the snap and sizzle of a professional pizzeria? You can finally ditch the delivery apps and master a homemade chicken pizza that beats any local shop. By combining aromatic Indian spices with Italian herbs, this unique recipe offers a flavor profile you cannot find in a frozen box.
The secret lies in using a cast iron pan to get that perfect pizza shop crunch. You start on the stovetop to crisp the bottom, then finish under the broiler for a golden cheese topping. This easy chicken preparation ensures every bite is juicy and packed with savory notes that outperform store-bought versions.
Whether you choose a classic dough or a no-yeast variety, these recipes give you complete control. You will learn to craft a pizza with a soft, chewy interior that rivals traditional wood-fired ovens. It is time to elevate your skills with this reliable chicken dish that brings restaurant quality to your dinner table. These recipes ensure a perfect result every time you use this recipe for your family.
Key Takeaways
- Discover how a fusion of Indian spices and Italian herbs creates a unique, gourmet flavor profile.
- Master the cast iron pan technique to achieve a signature crispy crust and chewy interior.
- Explore multiple dough options, including whole wheat and no-yeast varieties, for any dietary need.
- Learn the stovetop-to-broiler method to get perfectly melted, golden-brown cheese every time.
- Understand why this customizable dish has become a family favorite that beats commercial delivery.
- Gain the confidence to produce pizzeria-style results using common kitchen tools you already own.
Table of Contents
Why Homemade Chicken Pizza Beats Store-Bought Every Time
You might wonder why your family always asks for homemade chicken pizza instead of the frozen kind found in the store. Home cooks often report that children consistently prefer these fresh versions. The difference usually comes down to the crispy base and the soft chewy crust you can only get at home.
When you make a pizza in your own kitchen, you control every single ingredient. You can use high-quality cheese and seasoned chicken without any extra preservatives. Plus, your food goes from the oven to the table in very little time for maximum freshness.
Making a pizza yourself also helps you save money compared to ordering from a store. You can customize the chicken spice levels and toppings to fit your specific tastes perfectly. It is a satisfying way to build your skills while serving a tastier pizza to your guests. Using fresh chicken and vegetables makes your pizza much healthier.
- Ingredient Control: Select fresher vegetables and better meats without excess sodium.
- Texture: Achieve a superior crispy base that commercial brands cannot replicate.
- Cost Savings: Reduce your monthly food budget by avoiding delivery fees and tips.
| Feature | Homemade Pizza | Store-Bought Pizza |
|---|---|---|
| Crust Quality | Crispy and fluffy | Dense or soggy |
| Topping Freshness | Directly from the farm | Frozen or processed |
| Flavor Control | Fully customizable | Limited and fixed |
| Additive Content | None or minimal | High preservatives |
Essential Equipment for Perfect Chicken Pizza
Equipping your kitchen with a few key items ensures your homemade chicken pizza turns out perfectly every time. To achieve that restaurant-quality crunch and perfectly cooked toppings, you need a few reliable tools. Preparing your workspace ahead of time ensures a smooth baking process and a delicious result.
Cast Iron Pan or Skillet
A sturdy cast iron pan is the primary tool for achieving an exceptional, crispy crust. You can use a 12-to-14-inch pizza pan or even a flat dosa skillet for great results. These vessels conduct heat evenly and allow you to start the cooking process right on the stovetop.
While a pizza stone is a classic alternative, the cast iron method provides a superior texture in less time. This specific technique creates a signature crunch that regular baking sheets simply cannot match.
Basic Kitchen Tools You’ll Need
You require a rolling pin or just your hands to shape the dough on a clean surface. Use a kadai to sauté the chicken in a bit of oil to lock in moisture and flavor. If you choose a pizza stone, remember to preheat it inside your oven for at least thirty minutes.
A second pizza stone can help retain heat if you are making multiple batches. Finally, always transfer the finished pizza from the pan to a cooling rack to keep the base perfectly crisp.
| Essential Tool | Primary Purpose | Expected Result |
|---|---|---|
| Cast Iron Skillet | Conducts high heat | Ultra-crispy crust |
| Silicon Mat | Dough preparation | Non-stick handling |
| Cooling Rack | Resting the pizza | Prevents sogginess |
Ingredients for Homemade Chicken Pizza
Creating a gourmet experience at home requires a specific set of fresh ingredients to build your meal from the crust up. You must measure every component accurately to ensure the best flavor in your final dish.
The Pizza Dough
You can choose a basic or no-yeast pizza dough recipe. Most recipes require flour, yeast, water, and salt. Adding a small amount of olive oil makes the pizza dough more pliable. Ensure your pizza dough rests properly before you begin shaping your masterpiece.
The Chicken Filling
Sauté one finely chopped chicken breast in a tablespoon of olive oil. Add sliced onions, tomatoes, and bell peppers for a rich texture. Season the chicken with garlic powder, dried basil, and chili flakes. Mix in some sauce to keep the chicken moist and flavorful during the baking process.

Final Toppings and Cheese
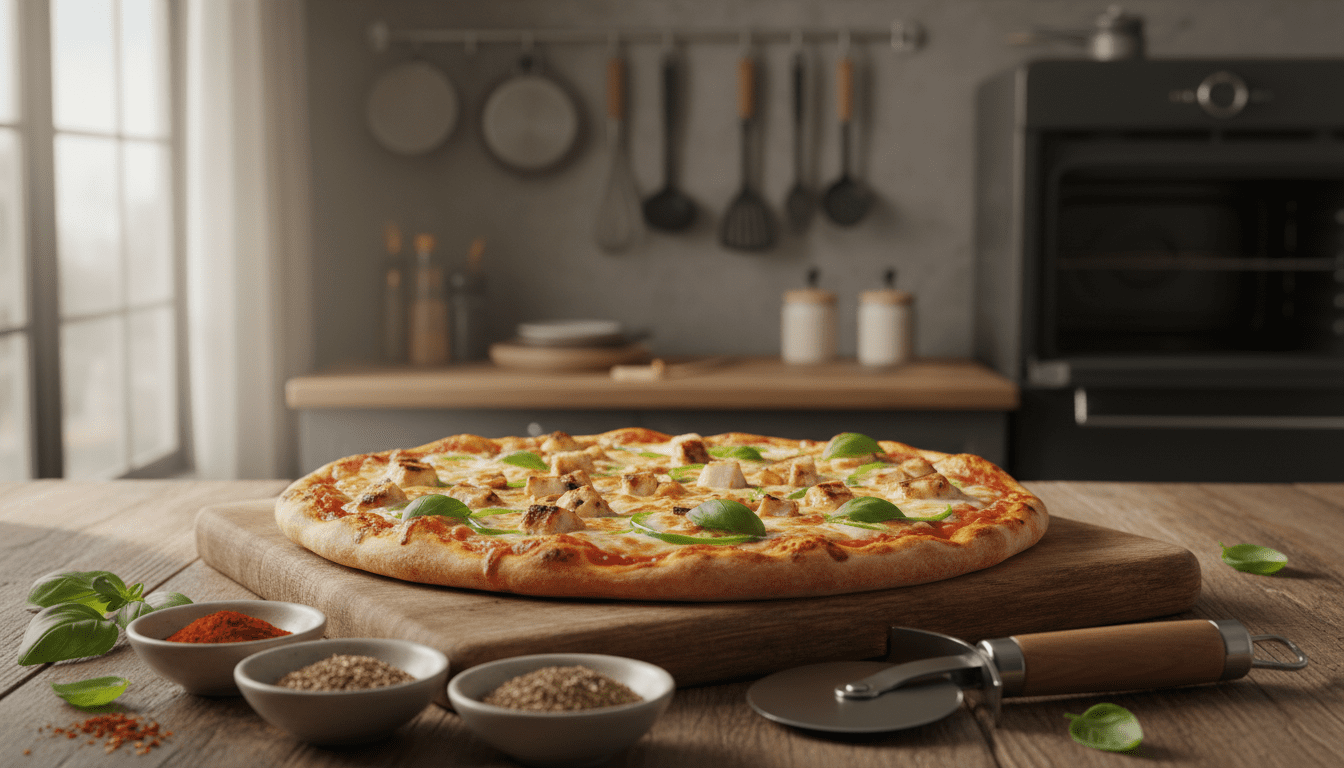
Layer your pizza with fresh ingredients like sliced tomatoes and olives. Spread a half cup of savory pizza sauce over the base. Top it with two cup portions of shredded mozzarella cheese for a golden finish. Fresh garlic and basil add the final touch of traditional Italian aroma.
| Category | Key Item | Quantity |
|---|---|---|
| Dairy | mozzarella cheese | 2 cup |
| Base | pizza sauce | 4 tablespoon |
| Aromatics | garlic | 2 Teaspoons |
| Pantry | Other ingredients | Per recipe |
| Liquid | Red sauce | 1/2 cup |
Preparing Your Pizza Dough
You begin the process by choosing a pizza dough recipe that fits your lifestyle and nutritional needs. Whether you prefer whole wheat for extra fiber or a no-yeast option for speed, the foundation is vital. Once the dough has completed its first rise, usually taking 30 to 90 minutes, you are ready to shape it.
Place a portion of the risen dough on a silicon mat or a lightly floured surface. Drizzle a small amount of olive oil on your hands to prevent sticking while you work. This makes the material much easier to handle and move around your workspace.
You can roll the pizza dough with a pin or stretch it by hand to your desired size. If the dough resists or springs back, let it relax for 10 minutes to soften the gluten. This extra time ensures you get an even thickness for your 12-inch or 14-inch crust.
Aim for a thin crust if you enjoy a crunch, or leave the dough thicker for a soft, bread-like chew. Applying a bit more olive oil to the edges can help create a beautiful golden finish. Handle the pizza dough gently to keep the structure light and airy before adding your flavorful chicken.
| Dough Type | Average Rise Time | Key Benefit |
|---|---|---|
| Whole Wheat | 60-90 Mins | High Fiber Content |
| Basic White | 45-60 Mins | Classic Traditional Taste |
| No-Yeast | 0 Mins | Fastest Preparation |
| Standard Dough | 30-90 Mins | Versatile Texture |
Making the Flavorful Chicken Filling
Creating a delicious masala-style protein layer adds depth and warmth to every single slice. You want a topping that is moist but not watery. This ensures your crust remains crisp under the weight of the ingredients.
A well-prepared chicken topping serves as the heart of your meal. By using fresh vegetables and a blend of spices, you elevate the flavor profile beyond standard pizzas. Balance is key when preparing this savory component.
Cooking the Chicken with Spices
Start by heating one tablespoon of olive oil in a pan over medium-high heat. Add your sliced onions, tomatoes, and bell peppers to the pan. Sauté these vegetables for about three minutes until they soften and the raw aroma fades.
Next, toss in the chopped chicken breast. Add two teaspoons of garlic powder along with your salt and paprika seasoning. Stir the chicken constantly for two minutes to ensure the spices coat the breast pieces evenly.
Adding Herbs and Finishing Touches
Lower the heat and cover the pan for four minutes. This step ensures the chicken is tender and fully cooked inside. If you see excess moisture, increase the flame to evaporate it before finishing the cooking process.
Stir in dried oregano, basil, and a pinch of garlic. Add another tablespoon of pizza sauce or ketchup to the chicken mixture. This creates a thick, masala-like consistency that stays on the dough.
Finally, sprinkle fresh basil or coriander over the mixture. This savory chicken filling will provide the perfect bite for your homemade masterpiece. Ensure the garlic flavor is prominent before removing the pan from the heat.
| Component | Main Ingredient | Function |
|---|---|---|
| Base Protein | Chicken | Provides hearty texture and flavor. |
| Aromatic Base | Garlic and Onions | Adds depth and a savory scent. |
| Herbal Finish | Fresh Basil | Brings brightness to the masala. |
| Liquid Binder | Pizza Sauce | Ensures the seasoning sticks to the meat. |
Rolling and Shaping Your Pizza Base
Transforming your risen pizza dough into a perfect circle requires a bit of patience and technique. You should first divide your dough into portions based on the size of your cast iron pan. Place one portion on a silicon mat and use your fingertips to gently flatten it from the center outward.
Using a rolling pin helps you achieve a uniform thickness throughout the dough. You should rotate the dough 90 degrees after every few rolls to maintain an even round shape. This movement ensures the base does not stick and stays consistent for an even bake.
Sometimes the dough fights back and shrinks while you are stretching it. If this happens, cover it and wait 10 minutes to let the gluten relax before you finish the recipe. This short pause makes it much easier to pull the pizza dough toward the side of the pan.
When you are ready, follow these steps to finish the base:
- Stretch the dough to match your pan dimensions precisely.
- Leave a thicker border around the perimeter to create a classic raised crust.
- Ensure there are no thin spots or tears in the center of the dough.
Working the edges carefully creates a crust that is perfectly crispy on the bottom and soft on the side. Finally, move the dough carefully into your prepared pan. This step sets the foundation for all your delicious toppings and ensures a professional look.
The Cast Iron Pan Method for Crispy Crust
Using a cold pan on the stovetop is the secret to a perfectly crispy crust. First, place your pizza pan on the burner without turning it on yet. Drizzle a little olive oil across the bottom to prevent sticking and add a rich flavor.
Carefully lay your rolled pizza dough into the greased pan, pressing it gently to ensure even contact. Turn the heat to the lowest setting possible to start the cooking process slowly. This method prevents the bottom from burning before you are ready for the oven.
Allow the pizza to sit for five minutes undisturbed on the burner. During these few minutes, the heavy pan distributes heat evenly across the entire base. Check the crust by lifting an edge with a spatula to look for a beautiful golden color.
| Process Step | Action Required | Resulting Benefit |
|---|---|---|
| Preparation | Cold Start | Gradual Heating |
| Oiling | Thin Layer | Superior Browning |
| Timing | 5-Minute Sear | Crispy Foundation |
Once the crust feels firm and looks light brown, you are ready to add your chicken and cheese. Using a heavy pizza pan replicates the intense environment of a professional stone oven. A final light coating of oil ensures the pizza slides out easily when finished.
Assembling Your Chicken Pizza
Transforming your dough into a masterpiece begins the moment you start assembling your chicken pizza right in the hot skillet. You work quickly while the heat from the stove cooks the bottom of your crust. This stage brings all your prepped ingredients together into one delicious meal.
Layering the Sauce and Chicken
Start by spreading 1/2 cup of pizza sauce across the dough while leaving a small border. This allows the crust to brown properly without becoming soggy. Distribute your spiced chicken filling evenly over the sauce layer to ensure every bite is flavorful. Use another spoonful of pizza sauce to keep the surface moist. Every slice should have a good portion of chicken. This step is vital for a great chicken pizza.
Adding Cheese and Toppings
Sprinkle two cups of shredded mozzarella cheese over the meat. Be liberal with the mozzarella to get that classic top pizza appearance. Add fresh toppings like onions and peppers. Use any remaining sauce to finish the edges before the final cooking stage. Complete this within five minutes so the pizza base stays crispy. This ensures your top pizza and cheese layer look professional. Finally, your chicken pizza is ready for the heat.
| Layer Component | Quantity | Primary Benefit |
|---|---|---|
| Pizza Sauce | 1/2 Cup | Rich flavor base |
| Chicken Filling | 1.5 Cups | Savory protein |
| Mozzarella | 2 Cups | Perfect melt |
| Fresh Toppings | 1/2 Cup | Crunch and color |
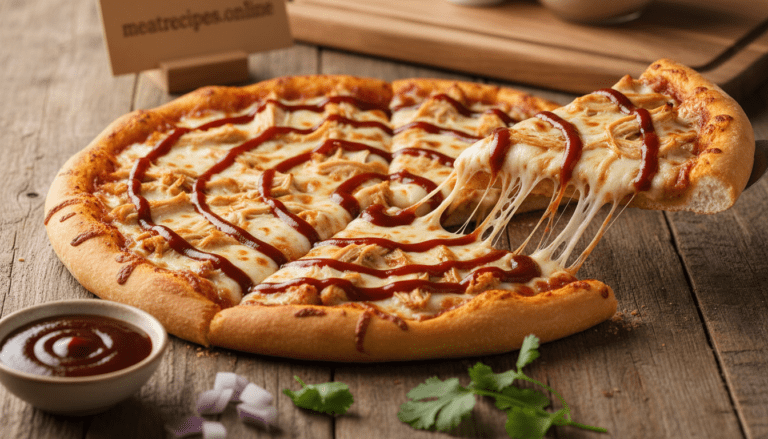
Baking Your Pizza to Golden Perfection
Watching your pizza bubble and brown is arguably the most satisfying part of the entire cooking process. To get that ideal crunch, you must preheat oven settings early to 250°C (482°F). High heat ensures the crust stays firm while the top becomes incredibly flavorful.
Proper baking techniques distinguish a soggy mess from a professional masterpiece. You want to see a beautiful golden brown hue across the melted mozzarella cheese. This intense heat transforms the raw dough into a structured, airy base that supports your heavy toppings.
The transition from the stovetop to the final heat source is critical for texture. You are looking for that specific moment when the edges begin to curl and darken. Achieving this balance requires your full attention during the final few minutes of the process.
Preparing the pizza for the final blast of heat ensures the flavors meld together perfectly. Whether you use a traditional flame or a modern broiler, the goal remains the same. You want a crispy bottom and a gooey, well-cooked surface.

Using the Oven and Broiler Method
You should preheat oven functions and activate the broiler before you even start the assembly. Once the bottom is crispy, transfer the cast iron pan directly under the intense top-down heat. You only need to wait 1 to 2 minutes for the cheese to become golden brown and bubbly.
Watch the pizza closely to avoid burning the delicate herbs or chicken. When the cheese reaches your desired color, you must remove from oven immediately to prevent overcooking. If the center needs more time, return the pan to the oven for two minutes to finish the baking.
Always use heavy-duty mitts when you remove from oven racks because the cast iron is extremely hot. This method gives you the best restaurant-style crust in a fraction of the usual time.
Stovetop-Only Method Without Oven
If you lack a standard oven, you can still reach baking success by using a tight lid. Cover the pan completely to trap the rising steam around the top of your ingredients. This environment melts the cheese while the bottom continues to crisp over the flame.
Cook on very low heat for 8 to 10 minutes to ensure the dough cooks through. If the cheese isn’t fully melted after this time, return the lid to the oven for two minutes on the heat. You must remove from oven areas (the stove) once the crust is golden and rigid.
Transfer the finished meal to a cooling rack to keep the top from becoming soggy. This alternative ensures a delicious result without needing any specialized high-heat appliances.
| Cooking Method | Heat Source | Total Time | Crust Texture |
| :— | :— | :— | :— |
| Broiler Method | 482°F + Stovetop | 6-7 Minutes | Charred & Airy |
| Stovetop Only | Low Flame + Lid | 8-10 Minutes | Crispy & Soft |
| Standard Bake | 425°F Central Rack | 12-15 Minutes | Uniform & Firm |
Choosing the Best Toppings for Your Chicken Pizza
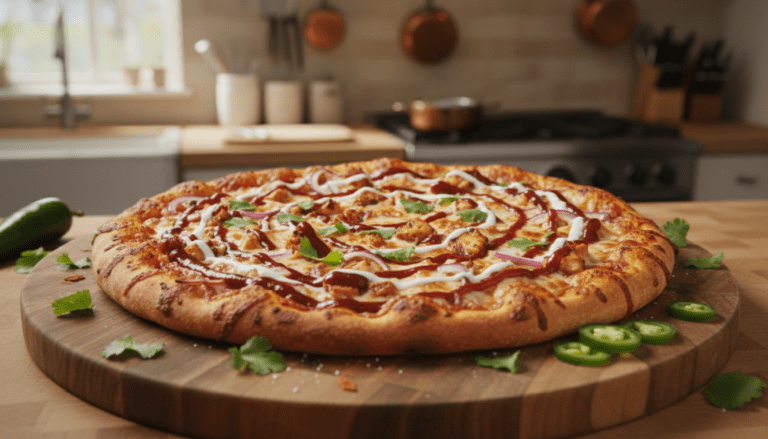
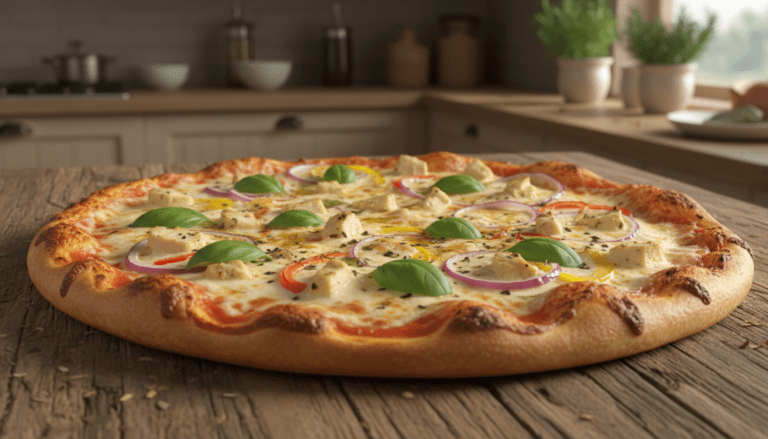
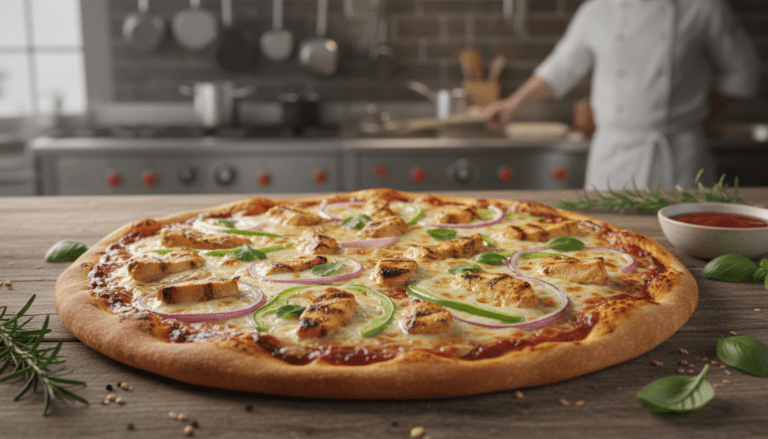
You can transform your chicken pizza by layering a vibrant mix of fresh vegetables and savory proteins. Choose classic pizza toppings like thinly sliced onions, fresh tomatoes, and colorful bell peppers to add a satisfying crunch. If you love a briny kick, toss on some sliced olives to complement your spiced chicken.
For a different twist, you might substitute grilled chicken for the traditional Indian-spiced filling. Adding extra pieces of grilled chicken on top of the cheese makes the meal even more filling for hungry teenagers or adults.
Be generous with the mozzarella to achieve that signature stretch. You should layer at least two cups of mozzarella cheese to ensure every slice has a golden, bubbling finish. You can also experiment with other pizza toppings like sliced mushrooms or fresh spinach to boost the nutrient profile.
| Topping Category | Recommended Ingredients | Benefit |
|---|---|---|
| Fresh Vegetables | Onions, Peppers, Tomatoes | Texture and color |
| Alternative Proteins | Tofu, Paneer, Mushrooms | Dietary variety |
| Savory Accents | Black Olives, Jalapeños | Bold flavor depth |
Whether you use chicken or a vegetarian alternative like paneer, these toppings ensure your pizza remains a household favorite. Customizing your toppings and the chicken pizza base allows you to cater to everyone’s dietary needs and preferences with ease.
- Use red onions and green peppers for a classic American flavor profile.
- Try adding mixed vegetables like carrots and beans for a unique, healthy twist.
- Layer fresh basil leaves after baking for a burst of aromatic freshness.
Tips for Achieving Restaurant-Quality Results
Turning your kitchen into a pizzeria is simple when you master the timing of your dough and the temperature of your crust. You should cook your pizza on the absolute lowest heat setting for five minutes during the stovetop phase. This gives the pizza dough enough time to become incredibly crispy without burning the bottom.
Ensure your chicken filling is completely dry before you add it to the dough. If you see extra moisture, increase the heat to evaporate it so the recipe stays thick and flavorful. This vital step prevents a soggy crust that can ruin your hard work and texture.
Be very generous with your mozzarella cheese to get that perfect golden glow across the top. Adequate cheese coverage creates the bubbly, melted finish found in high-end pizza shops. A great recipe focuses on balance, so do not overload the dough with too many heavy toppings.
Give your dough plenty of time to rise to ensure a light and chewy texture. Always preheat your broiler fully before finishing your chicken pizza to brown the edges quickly. This cast iron method truly mimics a wood-fired oven for your chicken pizza.
| Factor | Goal | Pro Tip |
|---|---|---|
| Heat Control | Crispy Base | Use lowest stovetop setting |
| Chicken Prep | Dry Filling | Evaporate all excess moisture |
| Cheese Level | Bubbly Top | Apply generous mozzarella layer |
| Topping Ratio | Even Cooking | Avoid overloading the center |
Variations and Customization Ideas
You have endless ways to customize this recipe and make it your own signature dish. For a meatless twist, create a vegetarian version of this pizza recipe by using paneer cubes, pressed tofu, or sautéed mushrooms. These protein swaps work perfectly with the existing spice blend to maintain a consistent, savory flavor profile.
You can also experiment with your dough by choosing whole wheat for added fiber or a no-yeast version for quick preparation. If you prefer a smoky taste, transform the dish into a BBQ chicken pizza by swapping the Indian spices for a bold barbecue sauce. This adaptation works wonderfully in a cast iron skillet to maintain that signature crispy crust.

Try using sliced grilled chicken breast to save time during busy weeknights when you need a fast meal. You might also add extra vegetables like diced carrots, green beans, or zucchini as a healthy side or topping. These additions provide extra nutrition and a delightful crunch to every single bite you take.
Always finish your pizza with extra red chili flakes or dried oregano for a spicy, aromatic kick. Many pizza recipes also benefit from adding a fresh side like a crisp green salad or warm, buttery garlic bread. You can even substitute coriander leaves with fresh basil for a more traditional Mediterranean herbal aroma.
A great chicken pizza needs the right cheese blend, so try mixing mozzarella with sharp cheddar, provolone, or salty parmesan. Using pre-cooked grilled chicken ensures a lean protein option for this versatile and delicious recipe. Customize the heat levels by adjusting the paprika or chili powder to suit your family’s specific preferences.
Every great recipe deserves a perfect side to complete the meal experience for your guests or family. Ensure your pizza has a thick or thin dough based on your personal texture preference and available baking tools. This chicken pizza is truly adaptable and remains a favorite choice for any casual gathering or weekend dinner.
| Variation Style | Primary Protein | Recommended Toppings |
|---|---|---|
| Vegetarian Twist | Paneer or Tofu | Carrots and Cauliflower |
| BBQ Fusion | Smoked Chicken | Red Onions and Corn |
| Classic Grilled | Grilled Chicken | Fresh Basil and Zucchini |
| Extra Spicy | Spiced Chicken | Chili Flakes and Peppers |
Storing and Reheating Leftover Pizza
You don’t have to worry about losing that perfect crunch if you know how to handle leftovers correctly. To store your extra pizza slices, place them in an airtight container for three to four days. If you want to save prep time, keep pre-baked crusts at room temperature or refrigerate the chicken filling for two days.
Always wrap your items tightly to prevent them from drying out in the fridge. Warming the filling separately ensures your meal stays fresh and vibrant.
When you are ready to eat, avoid using the microwave for the whole slice. Instead, place your pizza in a preheated oven for eight minutes. This specific oven method keeps the crust crispy and the chicken succulent. You can also use a pan for five minutes to get a quick, crunchy bottom.
If you prefer long-term storage, you can freeze an unbaked pizza for up to two months. Simply use your oven to bake it directly from frozen for a delicious experience. This approach helps you enjoy high-quality flavors even on your busiest nights.
| Storage Item | Storage Method | Shelf Life |
|---|---|---|
| Cooked Pizza Slices | Airtight Container | 3-4 Days |
| Chicken Filling | Sealed Container | 2 Days |
| Pre-baked Crust | Tightly Wrapped | 2 Days |
| Unbaked Pizza | Foil and Plastic Wrap | 2 Months |
Conclusion
Mastering this fusion chicken pizza recipe empowers you to create delicious, healthy meals right in your own kitchen. You now have complete instructions for creating a meal that rivals any restaurant. Using a cast iron pan ensures a crispy crust every time.
This recipe combines aromatic garlic and Indian spices with fresh basil and classic sauce. You can apply high heat on the stovetop for five minutes before moving it to the oven. This two-step process gives the chicken and cheese a perfect golden top.
This prep work pays off by offering better nutrition than frozen options. Follow these final instructions to balance spicy chicken with fresh vegetables. This homemade pizza provides great nutrition and flavor. Use these instructions to master the recipe, serve a tasty pizza, and enjoy your chicken. This homemade pizza is truly exceptional.
If you enjoy easy homemade meals, you may also like our ground beef taco recipe for a quick and flavorful dinner idea.
| Feature | Key Benefit |
|---|---|
| Cooking Method | Cast iron skillet for crispy base |
| Flavor Profile | Indian spices and Italian herbs |
| Health Value | Whole wheat and fresh produce |
FAQ
Which cheese provides the best melt for this dish?
How do I prepare the poultry?
What equipment ensures a crispy base?
Can I use different types of sauces?
How should I handle leftovers?
⭐ Love This Recipe? Tell Us What You Think!
There are no reviews yet. Be the first one to write one.