

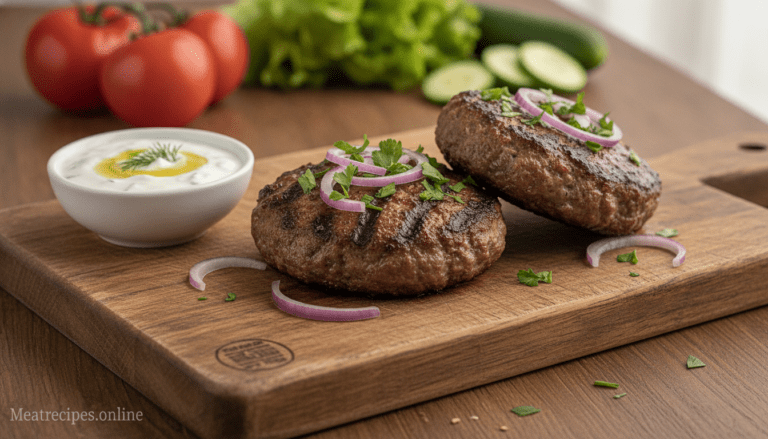
Taco Meat Recipe Ground Beef: Easy, Juicy and Flavorful in 20 Minutes
This quick, flavorful dish is a favorite for busy weeknights. You can turn simple ground beef into a juicy, restaurant-style filling in about 20 minutes. Tara Teaspoon confirms the short time makes this an ideal go-to for busy families.
What makes it so popular is the balance of savory spices and fresh pantry staples. A good taco seasoning mix lifts the flavor and keeps prep easy.
This homemade taco filling is versatile. Use it for tacos, bowls, or nachos when you want a satisfying dinner that comes together fast.
Using fresh ingredients and a straightforward method ensures consistent, juicy results everyone will enjoy at the table.
Key Takeaways
- Ready in about 20 minutes — perfect for busy nights.
- Transforms simple ground beef into a savory filling.
- Taco seasoning adds bold, restaurant-style flavor.
- Versatile for tacos, bowls, and casual gatherings.
- Easy to make with pantry staples and fresh ingredients.
Table of Contents
Why This Taco Meat Recipe Ground Beef Is a Weeknight Staple
A simple skillet and an 80/20 blend are all you need for a fast, family-friendly dinner. Tara Teaspoon notes this approach is a go-to for busy weeknights because it saves time without skimping on flavor.
You can cook one pound in about 20 minutes and still get juicy, seasoned filling. Choosing the best ground beef—an 80/20 ratio—helps the dish stay moist as it browns.
Keep a stash of pantry spices and you can customize heat and herbs for picky eaters. This base lets you spin off lots of other recipes, from bowls to loaded nachos.
- Fast to make for hectic evenings.
- Reliable texture and flavor when you pick the right blend.
- Easy to tweak so every member of your family is happy.
Mastering this basic taco meat means dinner stress fades. With a few pantry staples, you have a versatile protein base that fuels weeknights all school year long.
Essential Ingredients for the Perfect Taco Filling
The foundation of a great filling is balance: fat, spice, and a touch of tomato.
Select quality components before you start. Pick an 80/20 lean ground beef for the best texture—Tara Teaspoon recommends this ratio because the extra fat keeps the filling juicy as it browns.
Selecting the Right Beef
Choose the best ground that fits your taste. An 80/20 mix gives a tender, flavorful result without drying out.
Lean ground beef options work too, but expect a firmer bite and less richness. Finely dice your onions so they cook evenly and blend into the mix.

Pantry Spice Essentials
Your pantry should include high-quality chili powder, cumin, and garlic powder to build a reliable homemade taco seasoning. Fresh garlic and black pepper add depth and aroma.
Add a cup of tomato sauce rather than plain water to keep the filling moist and to help spices cling to the ground beef. Check that your chili powder is fresh—it’s the main source of heat and color.
- Gather spices, onions, garlic, tomato sauce, and your chosen ground before you begin.
- Use tomato plus spices for a rich coating that sticks to the cooked meat.
Step by Step Guide to Cooking Your Taco Meat
Start by heating a skillet over medium-high heat so your ingredients sizzle when they hit the pan.
Once hot, add the lean ground along with finely diced onions and minced garlic. Use a sturdy spatula or a meat chopper to break the protein into very small pieces as it browns.
Cook for about 8 to 10 minutes until the onions are soft and translucent and the filling is fully browned. Stir often so everything cooks evenly.
- After the meat is cooked through, stir in tomato sauce and your seasoning blend so every bit is coated.
- Bring to a low simmer and let the mixture cook for about 2 minutes to thicken and meld flavors.
- There’s no need to add water — the tomato adds enough moisture to keep the filling juicy.
- Finish with salt and pepper to taste and adjust heat if you want more spice.
“Cooking the onions until translucent ensures a sweet, soft texture that complements the savory filling.”
This simple, 10-minute active cooking method gives you consistent, juicy results that are perfect for tacos or bowls on busy weeknights.
According to the USDA, ground beef should be cooked to a safe internal temperature of 160°F to ensure it is safe to eat.
Pro Tips for Achieving Juicy and Flavorful Results
Small technique shifts make a big difference when you want tender, well-seasoned filling in minutes.
Start by breaking the ground into very fine crumbles so the sauce can cling to each piece. This creates even texture and helps the tomato coat the protein.
Toast cumin and chili powder in the skillet for about 30–60 seconds before adding the meat to wake up deeper, earthy flavor. Then add onions and garlic so they build a savory base.

- If the mixture gets too thick, a splash of water loosens it without diluting spices.
- Add a small amount of tomato sauce to keep the filling moist and prevent drying as it simmers.
- Use a heavy skillet to brown evenly and avoid burning delicate garlic powder.
- Avoid overcooking so the fat doesn’t render out completely; that preserves juiciness.
| Tip | Why it works | When to use |
|---|---|---|
| Fine crumbles | Sauce coats every piece | During browning |
| Toast spices | Boosts aroma and depth | Before adding protein |
| Tomato sauce | Retains moisture | When adding liquid |
| Splash of water | Adjusts consistency | If mixture is too thick |
“A little heat control and the right liquid keep your filling juicy and full of flavor.”
Creative Variations to Customize Your Taco Meat
Customize the base with heat, texture, or low-carb swaps to keep dinners fresh and fast. Small changes make this filling work for picky eaters, busy nights, or special diets.

Spicy Heat Adjustments
Add diced jalapeños or extra chili powder when you want bold, spicy flavor. Tara Teaspoon suggests fresh jalapeños for bright heat and crunchy texture.
Increase chili or cumin in small steps and taste as you go. A pinch of black pepper or smoked paprika also lifts the aroma without overwhelming the dish.
Low Carb Alternatives
For a low-carb option, serve the seasoned mix over cauliflower rice or inside large lettuce cups. These swaps keep protein front and center while cutting carbs.
You can also replace the usual shells with grilled zucchini or portobello caps for a hearty, lower-carb meal.
Homemade Seasoning Blends
Make a homemade taco seasoning so you control the amounts of cumin, garlic powder, and salt. Store a jar in the pantry for fast weeknight meals.
- Add black beans or corn to boost fiber and stretch the filling.
- Swap in ground turkey or a plant-based protein if you want a different protein.
- Finish with shredded cheese or a spoonful of fresh salsa for extra flavor.
Delicious Ways to Serve Your Seasoned Beef
Turn a hot skillet of seasoned protein into tacos, bowls, or loaded nachos in minutes.
Classic plates: Layer the filling in soft flour tortillas or crisp corn shells for easy ground beef tacos that kids and adults love. Add shredded cheese, chopped cilantro, and a squeeze of lime for bright contrast.
For a fun family dinner, pile the seasoned mix over tortilla chips to build loaded nachos. Top with beans, extra cheese, and fresh salsa. Keep a large skillet on the table to stay warm so everyone can assemble their own plates.
A lighter option is a taco salad: serve the savory filling over crisp lettuce with tomatoes, avocado, and a drizzle of salsa. If you want something heartier, stuff tortillas into large burritos with rice, beans, and more toppings.
- Serve in soft tortillas or crispy shells with lime and cilantro.
- Layer over chips for nachos with beans and melted cheese.
- Make a salad bowl over lettuce and cilantro lime rice for a low‑carb swap.
“Always offer fresh lime wedges and cilantro—those simple additions brighten every bite.”
Best Practices for Storage and Reheating
Smart storage preserves flavor and makes reheating quick and reliable. After cooking, let the filling cool completely on the counter for a short time, then transfer it to an airtight container before refrigerating.
Tara Teaspoon notes that leftovers keep for up to 4 days in the fridge. This makes the mix handy for lunches and fast dinners. For long-term plans, portion into freezer bags and freeze.
Freezing for Future Meals
- Store in the fridge for up to 4 days; divide into portions so you only thaw what you need.
- Freeze in airtight bags or containers for up to 3 months; press out air to prevent freezer burn.
- Do not freeze with fresh toppings like lettuce, tomatoes, or salsa—those lose texture.
- Reheat in a skillet over medium heat with a splash of water to restore moisture and texture.
- If you’re short on time, microwave frozen portions, stirring every 30–60 seconds so the mixture heats evenly.
“Always ensure the filling is piping hot before serving, especially when you add cheese or fresh salsa.”
Final Thoughts on Mastering Homemade Taco Meat
Get confident in the kitchen with a fast, flexible filling you can tweak any night.
Mastering this simple method, lets you feed your family a delicious homemade meal in about 20 minutes.
Focus on quality ingredients and the correct spice balance to lift plain beef into restaurant-quality tacos. Keep a jar of homemade taco seasoning in the pantry so you can pull together dinner on short notice.
The real strength of this dish is its versatility. Serve in shells, over rice, or on a bed of lettuce and finish with fresh toppings like cheese and salsa for bright contrast.
Try it, adjust to taste, and enjoy how a few smart ingredients transform weeknight dinners into favorites.
If you enjoy quick and easy beef recipes, you may also like our slow cooker beef stew and crispy chicken wings recipes. These dishes are perfect for family dinners and simple meal prep ideas.
FAQ
How long does it take to cook this taco meat in a skillet?
Can you use leaner ground options without losing flavor?
What’s the homemade seasoning blend and how much should you use?
How can you control spice level for kids or heat lovers?
Is it okay to add beans or vegetables to the filling?
What’s the best way to store leftovers and how long do they last?
How do you reheat without drying out the filling?
Can you make the seasoning salt-free for dietary needs?
What toppings and serving ideas work best with this filling?
Are there quick swaps for someone avoiding gluten or dairy?
⭐ Love This Recipe? Tell Us What You Think!
There are no reviews yet. Be the first one to write one.


One Comment
Comments are closed.