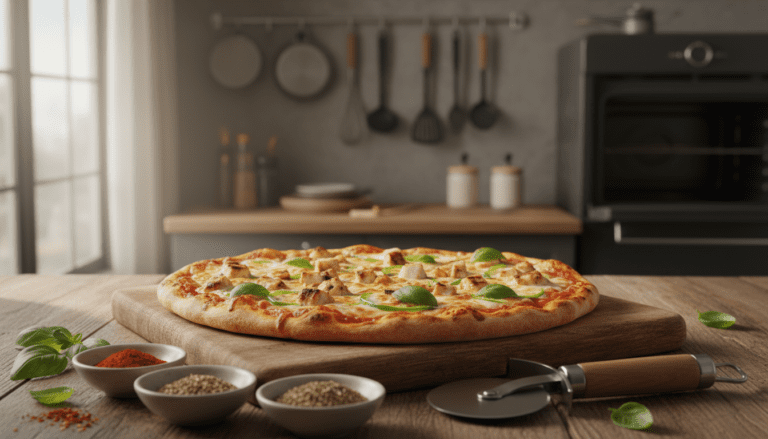
Your Delicious Chicken Pizza Recipe
Have you ever wondered why your home-baked pies never quite reach that crispy, savory perfection found at your favorite local spot? Most people assume a professional brick oven is required for such greatness.
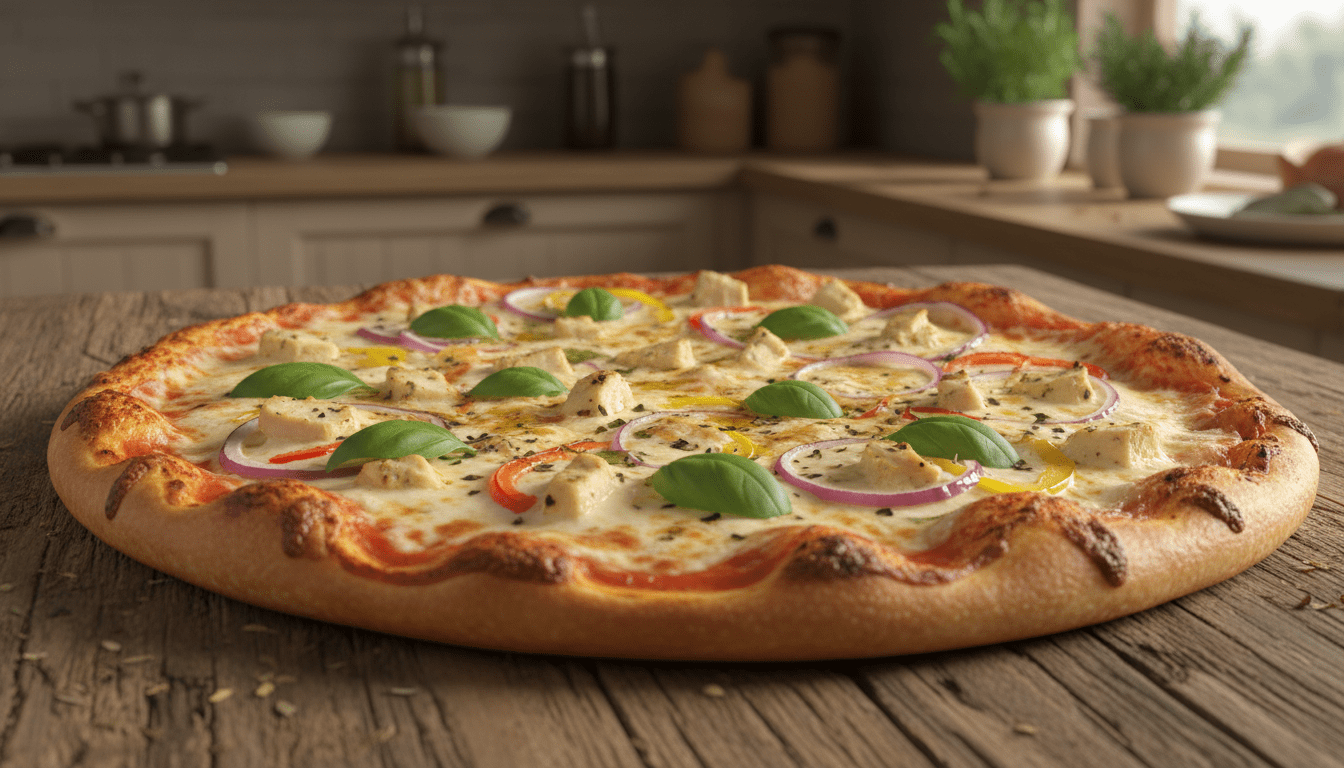
You are about to discover how to create a restaurant-quality meal right in your own kitchen. This specific approach combines savory chicken with a golden, crunchy crust that rivals any pizzeria.
You do not need expensive tools or years of culinary training to master this recipe. This pizza provides a reliable foundation that your entire family will request again and again for dinner.
This method balances simplicity with impressive results for any night of the week. You will soon feel confident making high-quality food from scratch without any stress. This approachable technique ensures every bite is full of flavor and texture.
Key Takeaways
- Achieve restaurant-quality results in your home kitchen.
- No professional or expensive cooking equipment is required.
- Master a golden, crispy crust with a reliable foundation.
- Perfectly balance seasoned toppings for a savory flavor.
- Create a meal suitable for both weeknights and special events.
- Follow a straightforward process designed for consistent success.
Table of Contents
Why You’ll Love This Chicken Pizza Recipe
If you are looking for a meal that combines protein and comfort, this chicken pizza recipe hits every mark. You will quickly discover that this chicken pizza is the ultimate solution for stress-free weeknight dinners. It delivers maximum flavor without requiring hours in your kitchen.
The chicken stays juicy while the crust achieves a satisfying crunch in every bite. This recipe stands out among other recipes because it offers incredible versatility. You can easily swap toppings to please the whole family while keeping the core pizza delicious.
- You gain a protein-rich meal by using seasoned chicken.
- The process uses simple pantry staples for a budget-friendly recipe.
- You get a perfectly golden and crispy crust every single time.
- It serves as a crowd-pleasing chicken pizza for kids and adults.
Making your own pizza at home is much cheaper than ordering takeout. You gain total control over the quality of every ingredient you use. This approach ensures a healthy and satisfying dinner for everyone at the table.
| Recipe Highlight | Main Benefit | Family Rating |
|---|---|---|
| Juicy Chicken | High protein content | Excellent |
| Crispy Crust | Perfect texture balance | Top Tier |
| Homemade Pizza | Healthier than delivery | Kid-Friendly |
Ingredients for Your Chicken Pizza Recipe
Preparing this savory dish requires a few simple yet high-quality items found at any local grocery store. You should gather all your ingredients before you start the cooking process. This preparation ensures your homemade pizza turns out perfectly every time.
Most of these items are likely already in your kitchen pantry or refrigerator. This list is very adaptable, so feel free to make substitutions based on what you have. You will need at least one cup of various base items to get started.
For the Pizza Dough
A reliable pizza dough is the foundation of a great meal. Using high-quality flour and fresh yeast helps the dough rise properly. Ensure your water is warm but not hot so it activates the yeast without killing it.
| Ingredient | Quantity | Purpose |
|---|---|---|
| All-Purpose Flour | 1 cup (plus extra) | Structure |
| Warm Water | 1 cup | Hydration |
| Olive oil | 1 Tablespoon | Flavor and texture |
| Yeast & Salt | 1 Packet / 1 tsp | Rise and seasoning |
You may also add a pinch of sugar to help the yeast grow faster. Once you mix the dough, let it rest in a warm spot. This creates a chewy and delicious pizza dough crust.
For the Sauce
Your sauce brings a punch of flavor to every single bite. You can use a pre-made tomato base or create your own from scratch. It spreads best when applied to the dough at room temperature.
- One cup of tomato sauce or crushed tomatoes.
- Minced garlic for a deep, savory aroma.
- A drizzle of olive oil to smooth out the texture.
- Dried herbs like oregano and basil for these ingredients.
For the Toppings
The toppings are what make this recipe truly special and satisfying. You will first need to prepare your cheese layer to act as a binder. We recommend using one cup of shredded mozzarella directly on the sauce.
Next, add your cooked chicken for a protein-packed meal. Use about one cup of diced chicken breast to cover the surface evenly. If you prefer more meat, add another half cup of chicken breast to the pile.
Now, it is time for the final layer of cheese. Spread another cup of mozzarella over the meat. Then, add one more cup of mozzarella to ensure total coverage. Extra mozzarella makes the pizza incredibly gooey and rich.
For those who love bold flavors, sprinkle on some extra garlic and mozzarella. You can also add veggies like peppers or onions at this stage. Finish the prep by brushing the crust with olive oil for a golden finish.
Keep a little mozzarella and olive oil on the side for adjustments. Having these ingredients ready makes the assembly fast and fun. You can even mix in a bit more garlic if you want a spicy kick!
Kitchen Tools and Equipment You’ll Need
Setting up your workspace with the correct tools ensures your chicken pizza comes out perfectly every time. You’ll achieve the best results when you have a quality pizza pan ready to distribute heat evenly. This preparation helps you create a consistently delicious crust that is never soggy in the middle.
While a standard pizza pan works best for this recipe, you can also use a baking sheet if that is what you have available. Using a reliable pan is the foundation for a crispy, golden finish. Make sure whatever surface you choose is clean and dry before you begin handling the dough.

Your oven is essential, so ensure it is functioning properly before you start the preheating process. You will also need a sturdy mixing bowl for the dough and a rolling pin to stretch it to the desired thickness. These simple tools allow you to create an even surface for all your delicious toppings.
Don’t forget measuring cups and a pastry brush to apply oil to your pan. A flat baking sheet or a pizza pan ensures the base cooks through thoroughly. Finally, have a sharp pizza cutter ready to slice your masterpiece once it leaves the pizza pan. Simply wipe your pan clean after the meal is over.
- Pizza Pan: Ideal for even heat distribution and a round shape.
- Rolling Pin: Helps achieve a uniform dough thickness.
- Mixing Bowls: Necessary for combining dry and wet ingredients.
- Measuring Tools: Essential for accurate proportions, especially for the crust.
- Pizza Cutter: Makes serving much easier once the baking is complete.
| Essential Tool | Primary Function | Preparation Tip |
|---|---|---|
| Pizza Pan | Baking the crust | Grease lightly for easy removal |
| Oven | Cooking the pizza | Preheat fully before baking |
| Rolling Pin | Shaping the dough | Flour slightly to prevent sticking |
| Pastry Brush | Applying oil | Reach the very edges of the crust |
Preparing Your Chicken for Pizza
Selecting the perfect preparation method for your chicken ensures your pizza turns out juicy and flavorful every time. You have two excellent options for the protein component, depending on your available prep time and personal preferences.
Using Cooked Chicken Breast
When using a fresh chicken breast, you must cook it completely before adding it to your pizza. This process usually takes about 20-25 minutes whether you choose to bake, grill, or pan-sear the meat.
Ensure the internal temperature reaches 165°F for food safety during the cooking process. Let the breast rest for a few moments so the juices stay inside before you start dicing it into bite-sized pieces.
Using a cooked chicken piece allows you to control the exact seasoning you want for your meal. Always ensure the meat is dry before it touches the dough to keep the crust crispy.
Using Rotisserie Chicken
A rotisserie chicken offers a convenient shortcut that saves significant effort while delivering deep, savory flavor. Simply remove the meat from the bones and shred the chicken into your desired size for even distribution.
This rotisserie chicken method is perfect if you want to skip the extra cooking step during a busy weeknight. Your cooked chicken should be slightly cooled before you put it on the pizza to prevent releasing too much moisture.
This helps the breast meat stay tender without making the dough soggy during the baking process. Using a high-quality chicken provides a professional taste with very little work.
| Method | Prep Difficulty | Main Benefit |
|---|---|---|
| Chicken Breast | Moderate | Custom Seasoning |
| Rotisserie | Low | Maximum Convenience |
| Leftover Chicken | Low | Reduces Food Waste |
- Cook fresh meat to 165°F for safety.
- Allow the meat to rest before dicing.
- Cool the protein to avoid a soggy crust.
Making or Preparing Your Pizza Dough
Starting with a fresh pizza dough is the secret to elevating your homemade meal to a professional level. You will find that making your own pizza dough is straightforward and requires just a few simple ingredients and some patience during the rising time.
First, activate your yeast in warm water for 5 minutes until it becomes foamy. Combine your flour and salt in a large bowl and add the yeast mixture. Mix these components together until a shaggy dough forms.
Knead the dough on a floured surface for 8-10 minutes until it feels smooth and elastic. This process develops the gluten, ensuring your crust has the perfect texture. Let the dough rise in a warm spot until it doubles in size.
| Preparation Method | Rise Duration | Final Texture |
|---|---|---|
| Homemade Fresh | 90 Minutes | Airy and Crisp |
| Store-Bought | 10 Minutes | Dense and Chewy |
| Quick Rise Yeast | 30 Minutes | Soft and Bready |
If you are busy, store-bought pizza dough is a great shortcut for a tasty pizza crust. Once your dough has risen, punch it down and let it rest for 10 minutes. This makes the dough much easier to shape into your favorite pizza crust.
This recipe yields enough dough for a large pizza. Using a homemade pizza dough ensures a crispy crust. It provides flavor and satisfaction that store-bought options often lack.
You can even split the dough for two small pizzas with a thin crust. Using pizza dough from scratch allows you to control the thickness of the crust. Shape it carefully to get the best results for your chicken pizza toppings.
Step-by-Step Instructions
Executing these clear instructions will help you create a professional-quality pizza right in your own kitchen. You will follow a logical flow to ensure the crust remains crispy and the flavors stay balanced. Follow each detail carefully to get the best results from your ingredients.
Step 1: Preheat Your Oven
First, you must preheat oven to 475°F (245°C) to ensure the heat is high enough for a crisp base. Give it at least 15-20 minutes to reach this temperature before you begin the process. A truly hot oven is the secret to achieving that gourmet, restaurant-style texture.
Step 2: Prepare Your Pizza Pan or Baking Sheet
While the heat builds, prepare your pan by lightly coating it with cooking spray or olive oil. This step prevents the dough from sticking and promotes even browning during baking. Ensure the entire surface is covered so your meal slides off easily after it finishes.

Step 3: Roll Out the Dough
Take your rested dough and place it on a lightly floured surface to prevent any mess. Use a rolling pin to shape it into a circle approximately 12-14 inches in diameter. Work from the center outward to maintain an even thickness throughout the base.
Step 4: Add Sauce and Cheese
Transfer the base to your sheet and spread the pizza sauce evenly across the surface. Leave a small gap around the edges to create a crust, then add the sauce in a thin, uniform layer. Sprinkle your cheese over the sauce to ensure every bite offers a perfect *cheese pull*.
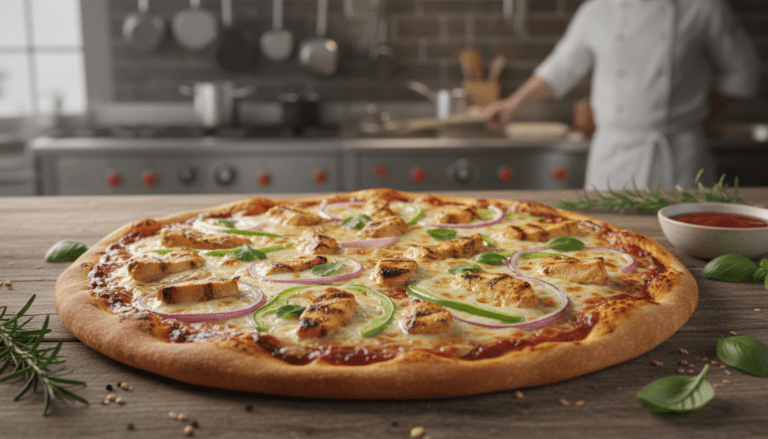
Step 5: Layer Your Chicken and Toppings
Now, arrange your prepared chicken pieces across the top pizza layer with even spacing. Add any additional toppings you enjoy, such as onions or peppers, on top of the other ingredients. Be careful not to overload the pizza so the crust stays firm and holds the chicken and toppings well.
Step 6: Bake Until Golden Brown
Place the tray in the hot oven and bake for 12-15 minutes until it looks ready. Watch for the crust to turn golden brown and the cheese to bubble enthusiastically. Let the top pizza cool for a few minutes before you follow the final serving instructions.
| Process Step | Main Ingredient | Essential Tip |
|---|---|---|
| Assembly | Dough and Sauce | Keep the sauce layer thin |
| Layering | Chicken | Distribute pieces evenly |
| Finishing | Pizza | Follow all assembly instructions |
By following these steps, you ensure that your homemade chicken dinner is both delicious and satisfying for everyone at the table.
Baking Your Chicken Pizza to Perfection
Achieving a restaurant-quality result depends entirely on how you manage the final heat in your kitchen. This critical stage turns your fresh ingredients into a crispy, melty delight that your whole family will love.
Oven Temperature and Time
You must maintain your oven at 475°F throughout the entire baking process for the best results. This high heat ensures the dough rises quickly and stays light. Most pizza recipes require about 12-15 minutes to reach the ideal texture.
Watch the pizza crust closely during the last few oven minutes to prevent burning. If the top browning happens too fast, you can tent it with foil. Then, return oven minutes to the lower rack to finish the base properly.
| Cooking Goal | Oven Position | Duration |
|---|---|---|
| Firm Base | Lower Rack | 8-10 Min |
| Melt Cheese | Middle Rack | 4-5 Min |
| Clean Slices | Countertop | 3 Min |
Checking for Doneness
Look for a golden brown edge and bubbling cheese to signal your meal is ready. Carefully remove oven sheets from the heat to check the bottom with a spatula. The base should feel firm and toasted rather than pale or soft.
If the bottom feels too soft, you should return oven trays to the heat for another 3 minutes. Once you remove oven pans finally, let the pizza rest for a short while. This allows the cheese to set and keeps the crust from getting soggy as it cools.
Some bakers prefer to return oven minutes for a quick final crisp on the top rack. Once you remove oven trays, wait two minutes before you start slicing. A firm crust is essential for a great pizza and makes the baking experience successful.
- Maintain a steady temperature of 475°F throughout the process.
- Check the bottom of the dough for a firm, toasted texture.
- Allow the cheese to set for at least two minutes before serving.
Topping Variations and Customization Ideas
Beyond the classic preparation, this chicken pizza serves as a canvas for endless culinary creativity. You can easily modify your recipe by swapping out the base sauce or adding unique toppings. Mastering these recipes allows you to make the perfect pizza for any family dinner or party.
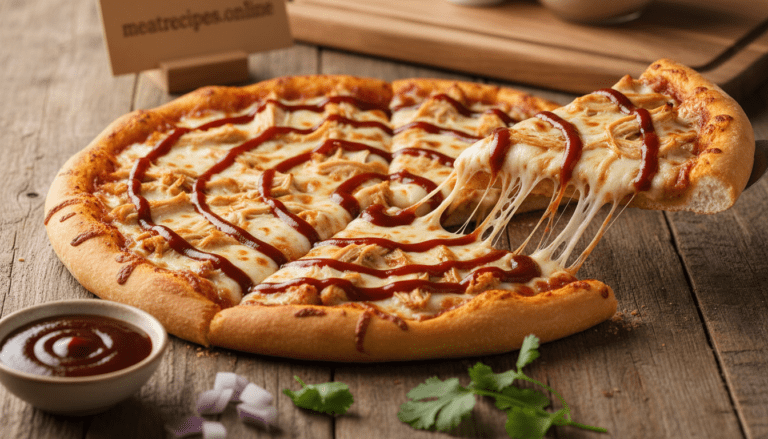
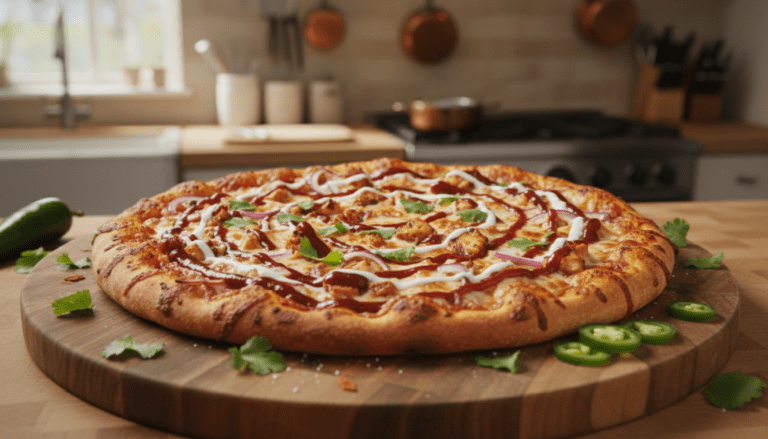
BBQ Chicken Pizza
For a smoky twist, replace the standard pizza sauce with your favorite barbecue brand. Toss the chicken in extra BBQ sauce before layering it with red onions and fresh cilantro. This bold recipe provides a sweet and tangy profile that appeals to everyone.
Buffalo Chicken Pizza
This version of chicken pizza is perfect for those who enjoy a bit of heat. Coat your chicken in spicy buffalo wing glaze and bake it until the crust is golden. Finish the hot pizza with a cool drizzle of ranch or blue cheese dressing to balance the spice.
Mediterranean Chicken Pizza
Create a lighter recipe by using fresh garlic, sun-dried tomatoes, and Kalamata olives. Sprinkle feta cheese over the chicken and add a final drizzle of olive oil. Using minced garlic instead of a heavy pizza sauce makes this pizza a refreshing choice for a summer meal.
Use the following table to explore more ways to customize your next meal:
| Style | Base Component | Main Protein |
|---|---|---|
| White Pizza | Olive Oil and garlic | Seasoned chicken |
| Pesto Style | Basil Pesto | Grilled strips |
| Alfredo Style | White Cream Glaze | Roasted pieces |
These recipes show how adaptable this chicken pizza foundation is. Here are a few more ways to customize your pizza experience:
- Experiment with additional toppings like roasted bell peppers, spinach, or goat cheese.
- Try adding fresh basil or other garden herbs after baking for extra aroma.
- Swap the mozzarella for sharp provolone or strong smoked gouda to change the flavor profile.
- Add some crispy bacon bits for a savory, salty crunch on every slice.
Serving Suggestions and Pairings
Finding the perfect side to accompany your homemade chicken pizza transforms a simple meal into a gourmet feast. You should consider what to serve alongside your food to create a balanced dinner that satisfies every guest. A crisp green salad makes an excellent side dish, providing a light contrast to the rich cheese and savory chicken.

If you love bold flavors, garlic bread or knots complement your meal beautifully. You can also offer a classic Caesar salad on the side for extra crunch and a refreshing bite. For a finishing touch, scatter fresh basil over your hot pizza just before serving to add a pop of color.
These additions create a complete and satisfying meal that everyone will enjoy:
- Serve roasted vegetables or a Caprese salad with tomatoes and fresh basil.
- Try a light minestrone or tomato soup during the cooler months to stay warm.
- Pair your meal with a cold beer, Italian wine, or sparkling water with lemon.
The fresh basil leaves add a burst of aromatic flavor that pairs well with the melted cheese. You might also enjoy dipping your crust in a garlic sauce or another flavorful side option. Finally, enjoy your delicious pizza with an extra sprinkle of garlic to finish the flavor profile perfectly.
Storage and Reheating Tips
Maximizing the life of your delicious pizza helps with your weekly meal prep. You will be pleased to know that this chicken pizza stores well for several days when refrigerated correctly.
Properly chilled leftovers keep their quality, making them a great option for a quick lunch. Always keep an eye on freshness to enjoy the best flavor every time you eat.
Storing Leftover Pizza
Place your leftover pizza in an airtight container or wrap individual slices tightly in plastic wrap. You should refrigerate these portions for up to 3 to 4 days.
The chicken and crust maintain their best texture during the first two days of storage. If you need longer storage, freeze individual slices for up to two months in heavy-duty freezer bags.
- Use airtight containers to prevent fridge odors.
- Wrap slices in foil for a very tight seal.
- Label your storage bags with the current date.
Reheating for Best Results
When you need to save time, avoid the microwave to keep the crust from getting soggy. Heating your meal in the oven at 375°F for about 8 to 10 minutes creates the best results. This method refreshes the chicken and ensures a crispy crust on the bottom.
| Method | Temperature | Duration |
|---|---|---|
| Oven | 375°F | 8-10 minutes |
| Skillet | Medium | 3-5 Minutes |
| Air Fryer | 350°F | 3-4 Minutes |
Nutritional Information
Understanding the nutritional profile of your meal is essential for managing your daily dietary intake. A single slice of this chicken pizza usually contains between 250 and 300 calories. This total changes depending on your choice of cheese and the thickness of the crust.
The high protein content is a major benefit of this delicious dish. You get about 15 to 20 grams of protein from the tender chicken and melted cheese. This makes it much more filling than a standard vegetable pizza.
Your meal provides calcium for bone health and B vitamins for energy. The crust delivers 25 to 30 grams of carbohydrates to keep you fueled throughout the day. You can even add a hint of garlic for extra flavor and various health perks.
Modify the nutrition by using whole wheat dough or reducing the dairy portions. Always remember that these approximate nutrition estimates vary based on your specific ingredient brands. These values provide a helpful guide for anyone tracking their fitness or health goals.
| Nutrient | Amount per Slice | Daily Value % |
|---|---|---|
| Calories | 275 kcal | 14% |
| Protein | 18g | 36% |
| Total Fat | 12g | 15% |
| Carbohydrates | 28g | 10% |
Conclusion
Your journey toward the perfect homemade slice begins with this reliable chicken pizza recipe. You now have everything needed to make this dish a regular feature in your weekly meal rotation.
This pizza recipe proves that you do not need expensive equipment to make recipe magic. Quality ingredients and a little time are all it takes to succeed in your kitchen.
Feel free to customize your pizza to match your tastes. Add extra garlic or experiment with various types of dough. Most pizza recipes are very flexible, so adjust the chicken toppings to suit your family’s specific needs.
As you follow this recipe, you will understand how your oven functions. Each pizza recipe you bake improves with more practice. Remember that even imperfect pizza recipes usually taste better than delivery.
Gather your dough and garlic to make recipe memories today. This recipe helps you share a wonderful meal. This chicken dish is perfect, and every pizza is a great recipe to share. Your next pizza recipe will be a success, so enjoy this simple recipe and your delicious pizza recipe results.
If you enjoy bold and savory flavors, you can also try this taco meat seasoning recipe to add a delicious twist to your homemade meals.
| Feature | Benefit |
|---|---|
| Customization | Tailor toppings and garlic levels to your preference. |
| Flexibility | Works with different dough types and chicken styles. |
| Quality | Provides restaurant-quality results at home. |
FAQ
How much time is required for prep and cooking?
What is the best way to ensure a crispy base?
Can I use different types of meat for the toppings?
How should I store and return oven for leftovers?
What can I add to enhance the nutrition of this chicken pizza recipe?
⭐ Love This Recipe? Tell Us What You Think!
There are no reviews yet. Be the first one to write one.