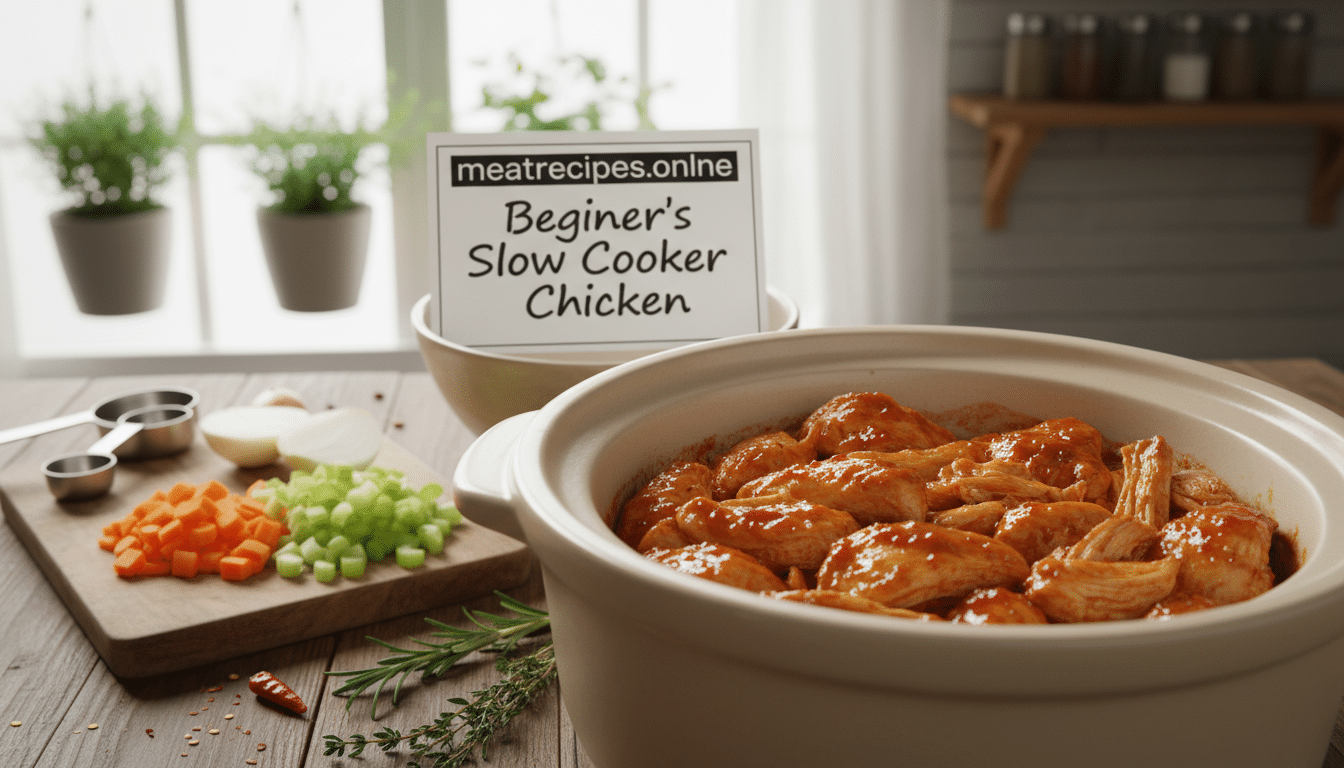
How to Cook Chicken in a Crock Pot (Beginner’s Step-by-Step Guide)
How to cook chicken in crock pot without ending up with dry or undercooked meat is a common question for beginners. This guide gives you a simple step-by-step plan to get safe, juicy results every time, even if you’ve never used a slow cooker before.
Big rule: aim for 165°F in the thickest part, not an all-day guessing game. I’ll show you safe temps, cook times by cut, and why LOW usually saves breasts from drying out.
You’ll learn safe handling, quick timing for breasts, thighs, and a whole bird, plus simple seasoning and optional broth tips. I’ll also include a quick-reference time table and links to related guides like crockpot shredded chicken for perfect shredding.
Meal prep wins: cook once, eat all week — tacos, salads, bowls, and sandwiches. You’ll get two easy shredding methods, tips for saving juices for moisture, and common mistakes to avoid.
Key Takeaways
- Aim for 165°F in the thickest part for safety and doneness.
- Use LOW for breasts to cut dryness; check early around 2.5–3.5 hours.
- No added liquid is required; chicken releases its own juices.
- Guide covers breasts, thighs, whole bird, plus a quick time table.
- Two shredding methods: two forks or a stand mixer, plus saving juices.
- Perfect for meal prep: cook once and use for multiple dinners all week.
Table of Contents
Can You Cook Raw Chicken in a Crock Pot?
Yes — you can start with raw poultry in your slow cooker. The key is reaching a safe internal temperature of 165°F at the thickest part. Use a good meat thermometer and check the center, not the surface.
Why 165°F matters
165°F kills harmful bacteria. That number is the safety benchmark for poultry. It ensures the meat is safe even when it looks done on the outside.
When it’s not a good idea
Frozen pieces can heat unevenly. The outside may rise while the core stays cold. That risks long stretches in the danger zone and unsafe food.
- Direct answer: raw poultry is fine if it reaches 165°F.
- Safe habit: start with thawed meat when possible and use a thermometer.
- Timing note: cook times vary by cooker, size, and fullness — minutes or hours can change the result.
What You Need for Slow Cooker Chicken That Tastes Good
Start with smart choices — the right pieces, salt, and garlic — and the results will sing. Pick a clear goal: lean meals, forgiving texture, or lots of leftovers. That choice guides your cut and simple prep.
Best cuts for beginners
Chicken breasts are lean and cook faster, great for quick shredding. A 4 lb pack usually fits a 6-quart slow cooker.
Chicken thighs are more forgiving if you need longer low hours. A whole chicken gives maximum flavor and bones for stock.
Simple seasoning that works every time
Starter seasoning: kosher salt + garlic powder + pepper. Use teaspoons for easy measuring: try 1 teaspoon salt per pound and 1 teaspoon garlic, then adjust next time.
Tip: don’t under-salt — rotisserie-style flavor comes from enough salt and garlic.
Do you need chicken broth or water?
Most of the time no added liquid is required. The meat often releases about 1.5 cups of juices. Add chicken broth only if you want extra pan juices or your cooker runs hot as a buffer.
Helpful tools and quick prep
- Meat thermometer (most important)
- Tongs for lifting
- 6-quart slow cooker for family-size batches
Trim visible fat during prep so liquid isn’t greasy. Save and strain the juices and add some back after shredding for extra moisture.
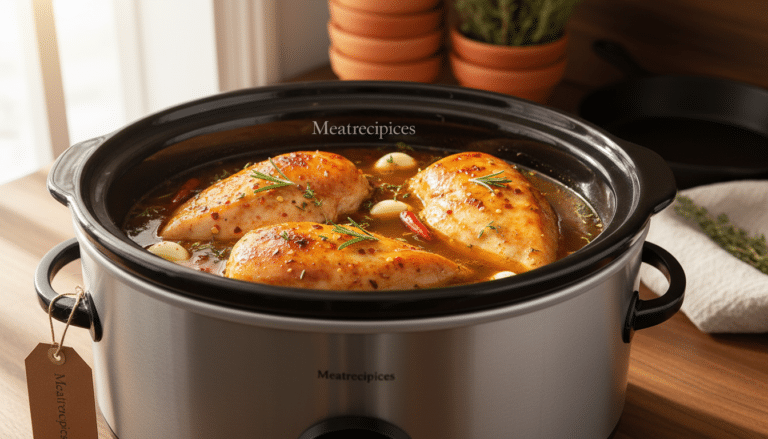
How to Cook Chicken in Crock Pot
Prep is the biggest secret to juicy results. Start with a quick trim and simple seasoning — small steps that protect texture and boost flavor.
Trim and season
Remove large, rubbery fat pockets and loose flaps that turn chewy. Trim only what you can lift easily; bones and small fat bits help flavor the juices.
Season both sides — sprinkle salt, pepper, and an optional mix of garlic and onion powder. Use about 1 teaspoon of salt per pound as a baseline.
Arrange for even cooking
Place pieces in a single layer when possible. Avoid stacking thick pieces on top of each other so heat reaches every part evenly.
Set temp and check early
Start on LOW for best texture. Many breasts hit doneness around 2–3 hours on LOW, so set a timer and begin checking early.
Know it’s done without guessing
Use a meat thermometer: the thickest part must reach 165°F. The meat should also shred or slice easily — not feel rubbery — before you rest and serve.
Chicken Cooking Times in the Crock Pot (By Cut)
Expect big differences: a lean chicken breast often needs far less low time than larger bone-in pieces. Use these ranges as a guide and let your thermometer decide readiness.

Boneless, skinless breasts
Many boneless, skinless chicken breasts reach 165°F around 2.5–3.5 hours on LOW. Thicker pieces may take longer. Avoid letting breasts sit past done time — that extra time squeezes out moisture and makes the texture tough.
Thighs
Thighs tolerate longer low hours. Their higher fat content keeps meat juicy even at 4–6 hours. Choose thighs when you need flexible timing or a forgiving batch for shredding.
Whole chicken
Whole birds change the equation. Bone-in size and weight add time. A medium whole bird often needs 4–6 hours on LOW. Always check the thickest part, such as the thigh, for temperature rather than relying only on the clock.
What makes cook time vary
- Starting temp: fridge-cold pieces take longer than room-warm ones.
- Thickness and stacking: packed or stacked pieces slow heat circulation for cooker chicken.
- Slow cooker model and fullness: a fuller pot can speed heating; small inserts run faster or slower based on wattage.
Quick rule: use hour ranges as your map, but your meat thermometer is the final authority.
Slow Cooker Chicken Time Table (Quick Reference)
This one-page guide gives simple LOW and HIGH time ranges for breasts, thighs, bone-in pieces, and whole birds. Use the chart as a screenshot-ready reference and always verify doneness with a thermometer.
| Cut | Approx. weight/thickness | LOW (hours) | HIGH (hours / minutes) | Target internal temp |
|---|---|---|---|---|
| Boneless, skinless breasts | 1–1.5 inch thick pieces | 2.5–3.5 hours (larger batches 4–6) | 1.5–2.5 hours (check early; may dry) | 165°F minimum |
| Boneless thighs | Regular portioned pieces | 3–4 hours | 2–3 hours (for faster finish) | 165°F minimum |
| Bone-in pieces (drumsticks, split breasts) | With bone, varied thickness | 3.5–5 hours | 2–3.5 hours | 165°F minimum |
| Whole chicken | 3–5 lb bird | 4–6 hours | 3–4.5 hours | 165°F minimum |
- Note: HIGH settings vary by model and can overshoot quickly, especially for breasts—check early.
- Done can happen sooner if pieces are small or your slow cooker runs hot.
- Stacked or very full slow cookers increase time; arrange in a single layer when possible.
LOW vs HIGH Setting: What You Should Use (and Why)
Choosing the right heat setting changes texture and flavor more than any spice will. Your slow cooker’s gentle heat usually produces the most tender results. This section explains practical reasons and gives a short rule you can remember.

Why LOW usually gives juicier results
LOW delivers steady, gentle heat, so muscle fibers relax rather than tighten. That means less moisture squeezed out and a softer bite.
Why HIGH can dry breasts and toughen meat
High heat ramps the interior fast. Boneless, skinless chicken breasts often hit the safe temp near three hours on LOW. On HIGH they can spike past that point and keep cooking, which dries them out.
Best compromise when you’re short on time
If you’re rushed, try one of these options:
- Start on LOW and add an extra hour so breasts reach temp without overcooking.
- Use HIGH only for short windows and check temperature early and often.
- Choose thighs for long runs — they tolerate higher heat and hold flavor well.
Simple rule: if you must leave it longer, pick thighs; if using breasts, plan a check around three hours. Treat your first batch as a calibration run for your specific cooker, then adjust seasoning and timing for rotisserie-style flavor and texture.
Safe Internal Temperature: 165°F Without Overcooking
A precise thermometer reading replaces guesswork and stops extra minutes that dry meat out.
Goal: reach 165°F in the thickest part, then remove from heat—extra time is what squeezes out moisture. This is the key piece of information that keeps food safe and tender.
Thermometer placement for common cuts
Place the probe where the meat is thickest. Avoid touching bone or the cooker wall for an accurate read.
| Cut | Probe location | Key note |
|---|---|---|
| Chicken breast | Center of the thickest part, not near an edge | Insert straight in; avoid bone or thin edges |
| Chicken thighs | Thickest muscle, angled to miss the bone | Hitting bone gives a false high reading |
| Whole chicken | Thigh deep near the joint plus thickest breast spot | Check both places for full doneness |
What “shreds easily” tells you
When a fork slides in and meat pulls apart with little resistance, it shreds easily. That texture cue matches a safe internal temp and confirms tenderness.
- Use temperature as your safety check.
- Use shredding as your texture check.
- Start checking a few minutes earlier than the listed time; slow cookers vary widely.
Tips to Prevent Dry or Overcooked Crockpot Chicken
A simple early check can save a batch from drying out and teach you your cooker’s timing. Many boneless, skinless breasts reach 165°F around 2.5–3.5 hours on LOW, so set a timer and test early on your first run.

Practical, simple steps
Don’t let breasts run all day. Once a breast hits safe temp, extra time squeezes moisture and makes it tough. If you must leave food longer, swap in thighs — they tolerate long low hours much better.
No added liquid is usually needed; meat releases roughly 1.5 cups of juices. Pour off and strain that cooking liquid, shred the meat, then stir a little broth back in until pieces look juicy again.
- Trim visible fat before cooking so your reserved liquid stays clean and not greasy.
- Keep seasoning simple: salt + garlic + pepper works. Don’t under-salt if you want rotisserie-style flavor.
- Check early the first time you use a new crockpot — learn its quirks and avoid overcooking later.
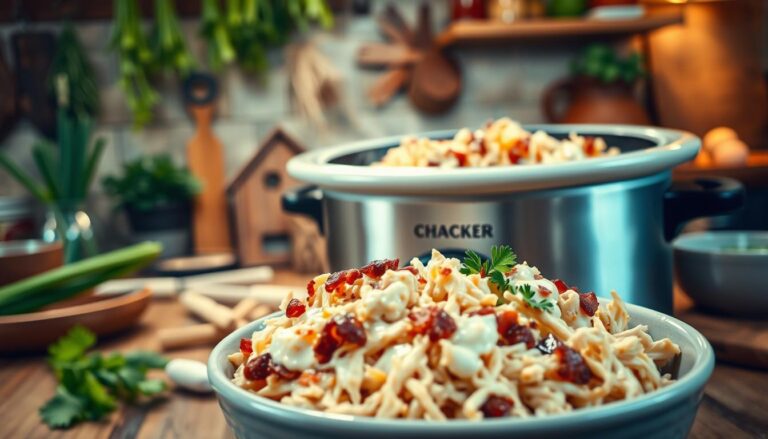
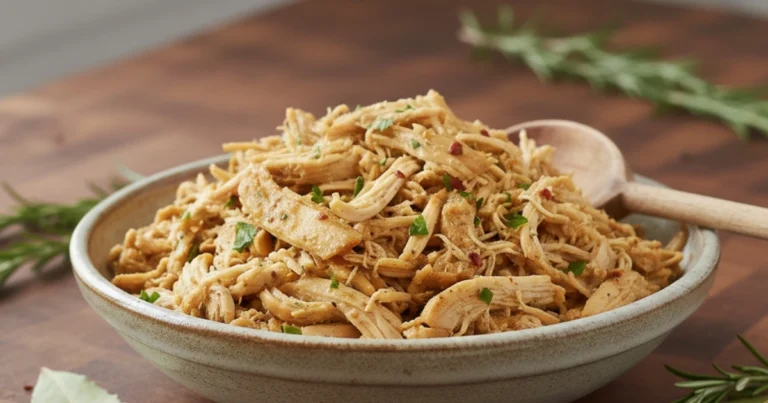
How to Shred Crock Pot Chicken Properly
The right shredding method keeps juices locked in and saves time during meal prep.
Professional chefs often recommend simple shredding techniques to keep the meat tender and juicy.
Rest briefly so juices stay in
Let the meat rest for a few minutes after you remove it from the slow cooker. That pause helps juices redistribute and prevents a dry final result.
Two forks method — chunky results
Place pieces on a cutting board and hold steady. Use two forks to pull the meat apart into large, taco-ready shreds. This takes a bit of elbow work but keeps texture and bite.
Stand mixer method — fast and fine
Use a paddle attachment and mix on low for 20–30 seconds. Stop and check for doneness; repeat briefly if you want finer strands. This method is great for salads and casseroles.
Save your moisture
Pour off and strain the cooking liquid first. Shred the meat, then add small amounts back until pieces look juicy again. This step makes your protein flexible for many recipes.
- Portioning tip: one 4 lb batch yields about six 1-cup servings or twelve 1/2-cup portions for sandwiches and lunches.
- Freeze in 1-cup bags for dinners or 1/2-cup packs for quick sandwiches.
- For more flavor ideas, check the crockpot shredded chicken guide and the guide on how the timing and temps help it shred perfectly.
| Yield | Portion size | Use |
|---|---|---|
| 6 cups | 1 cup | Dinner recipes, bowls |
| 12 half-cups | 1/2 cup | Sandwiches, lunches |
| Freeze packs | 1 cup or 1/2 cup | Meal prep grab-and-go |
Common Beginner Mistakes (and Easy Fixes)
Your slow cooker delivers great results once you avoid a handful of common traps.
Cooking too long “just to be safe.” Many home cooks leave meat on until it feels certain. The safer move is a quick thermometer check: stop once the thickest spot hits 165°F. Extra minutes squeeze out moisture.
Using HIGH for breasts
High heat can push boneless, skinless chicken breasts past perfect into dry, tough meat. Use LOW and check early. If you must speed things up, pick thighs or reduce the setting and test sooner.
Skipping the thermometer
One quick poke in the thickest part replaces guessing. A reliable probe saves batches and builds confidence in your cooker’s timing.
Overfilling the slow cooker
Tightly packed pieces block heat and steam flow. Arrange a single layer when possible. If you must stack, expect longer cook time and check more often.
Not trimming fat
Melted fat can pool and harden into greasy clumps. Trim obvious fat before you prepare the bird or pieces. Cleaner juices make better gravy and less heavy flavor.
Shredding without saving juices
Don’t tear meat apart while it sits in pooled liquid. Pour off and strain the juices first, shred on a board or in a mixer, then stir a little reserved liquid back in for moist, flexible results.
Final confidence note: avoid these mistakes and your slow cooker becomes a reliable shortcut for weeknight meals. Small checks save time and deliver a consistent, juicy outcome.
Storage, Reheating, and Meal Prep Ideas
With a little planning, a single batch becomes multiple dinners and quick lunches. Follow simple steps for safe storage and fast reheats so your meals stay juicy and ready.
How to store cooked chicken safely in the fridge
Cool pieces quickly, then place in airtight containers. Use within 3–4 days for best texture and safety.
Freezer tips for shredded chicken (best portion sizes)
Freeze flat in zip bags so they thaw fast. Portion as 1-cup packs for a full meal or 1/2-cup for sandwiches and sides.
How to reheat without drying it out
Warm gently on low heat or in the microwave for short bursts. Add a splash of chicken broth or reserved juices and stir; this restores moisture in a few minutes.
Meal prep ideas
- Tacos and wraps — add quick slaw and salsa for a fast dinner.
- Salads and bowls — top greens or rice with a cup of shredded meat.
- Sandwiches and pasta — mix with a little broth for saucy results.
- Simple side ideas: roasted veggies or a quick grain for balance.
Quick questions beginners ask
- Raw overnight? No — don’t leave raw meat at room temp; refrigerate or start thawed.
- Covered with liquid? Usually no — meat makes enough juices; add broth if you want extra sauce.
- Rubbery or tough? Often overcooked or too hot; remove once it hits 165°F and rest briefly.
- Breasts and thighs together? Yes, but check the thickest pieces and remove items as they reach safe temp.
| Portion | Use | Thaw time |
|---|---|---|
| 1 cup | Meal or bowl | 20–30 minutes in warm water |
| 1/2 cup | Sandwiches, side | 15–20 minutes |
| Flat 2–3 cup pack | Family dinner | 30–40 minutes |
Note: watch sodium when seasoning up front. If you limit salt, add more at serving so the meal stays balanced and not bland.
Conclusion
Close the process with a practical plan you can repeat for reliable results.
Quick checklist: season, set the slow cooker on LOW, start checking early, and remove pieces at 165°F. This prevents overcooking and keeps meat tender.
Pick breasts when you need faster meals and choose thighs if you’ll leave the food for longer hours. Give each batch a brief rest, then shred or slice as needed.
Save and strain the cooking juices. Add a little back after shredding for extra moisture and flavor. Keep a meat thermometer handy — it is the single tool that prevents mistakes.
Next steps: try the shredded chicken guide for flavor ideas and the shred-timing and temp guide for perfect pulls every time.